



10-12-2026, 03:40 AM
Quick answer
Point your domain's A record to the VPS, open WP Toolkit → Add Wordpress, enter the domain, website title and administrator email, choose PHP and WordPress versions, and confirm installation. Check HTTPS and log in at /wp-admin. On our Free Edition lab, password-free login opened a Pro upgrade prompt; normal WordPress login worked.
Tested result
We created a separate website at wp.adminslab.com using aaPanel 8.0.6 Free Edition, Nginx, PHP 8.5 and WordPress 7.1.3. The homepage loaded over HTTPS, HTTP redirected to HTTPS, and normal login reached the authenticated WordPress dashboard. The existing manually installed WordPress site was kept separate.
Before starting
1. Add the domain's DNS record
We used a separate subdomain so the demonstration did not replace our existing site. In Cloudflare → DNS → Records, we added an A record with name wp and the lab VPS address, using DNS only for the initial setup. Use your own server address, not the lab address.
Wait for the domain to resolve to the intended server before applying for SSL. Avoid adding an unrelated AAAA record pointing elsewhere. If you use Cloudflare proxying, review certificate validation and your SSL mode deliberately rather than assuming a certificate is already installed at the origin.
For the DNS setup workflow, see the Cloudflare guides in the Cloudflare section.
2. Open WP Toolkit
In aaPanel's left menu, click WP Toolkit. Use Local Manage for a site hosted on this server, then click Add Wordpress. Select Create site in the dialog.
3. Fill the new-site form
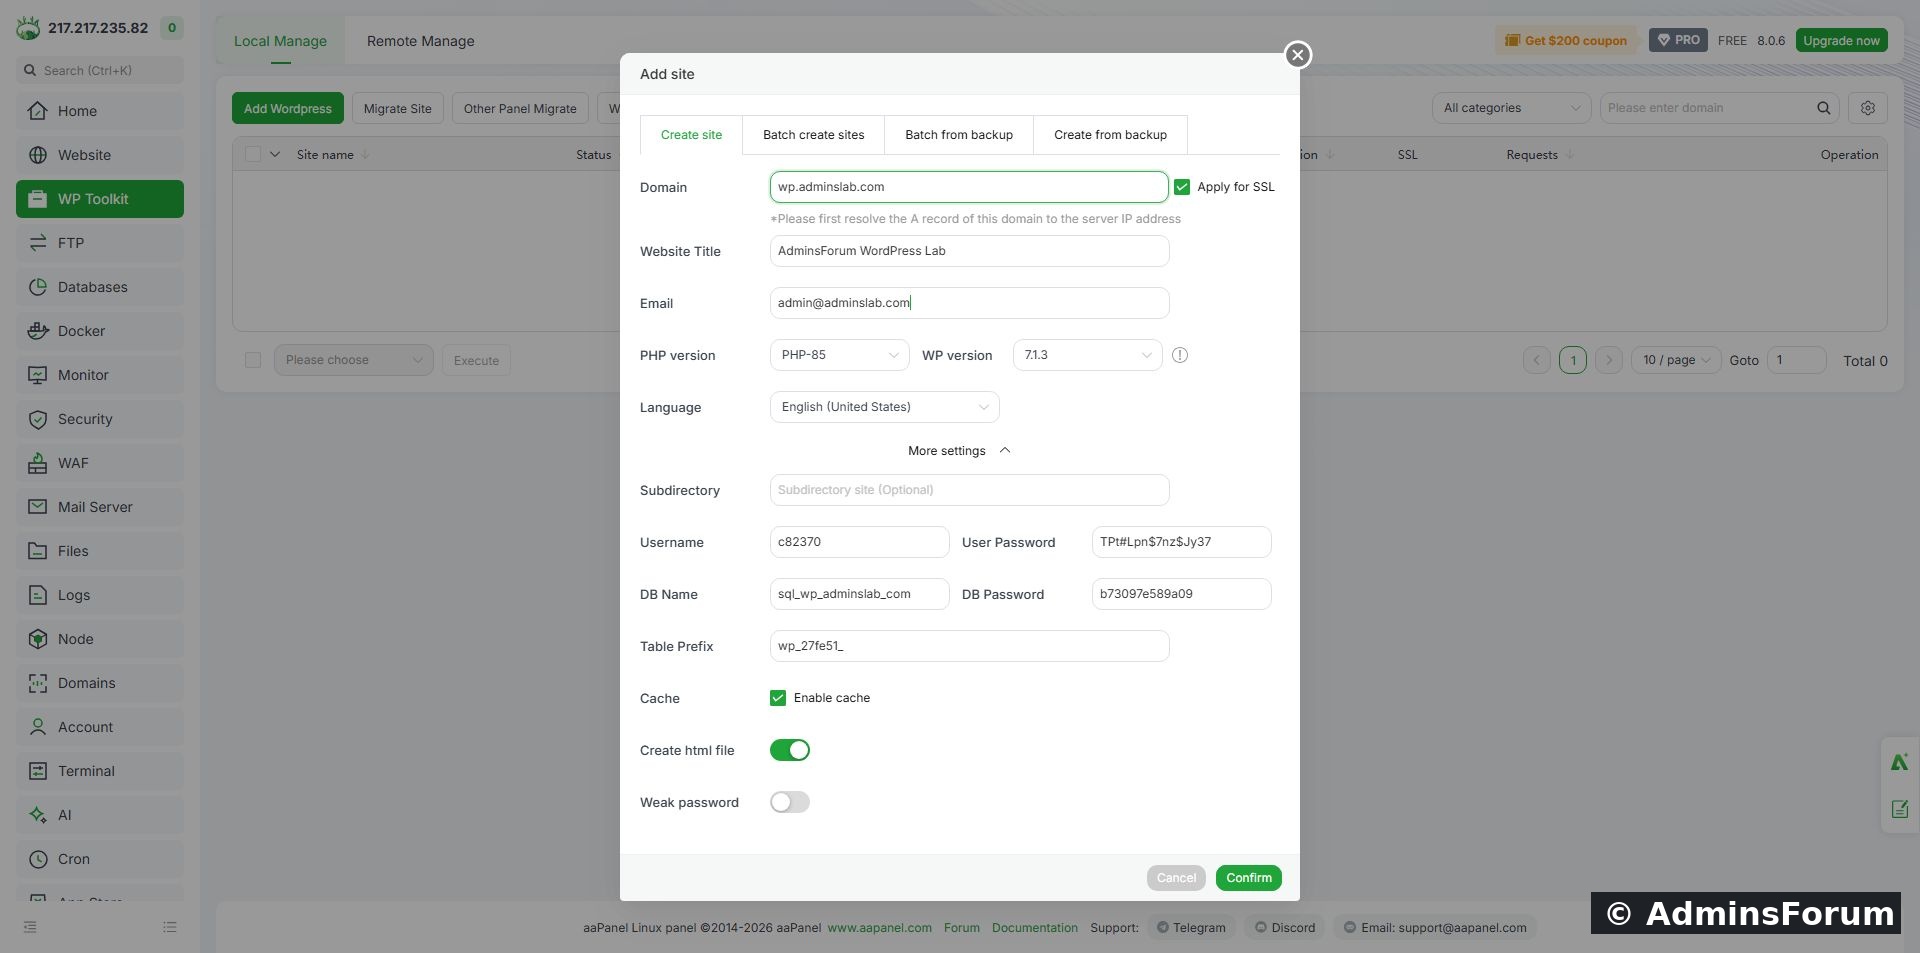
AdminsForum lab: the new-site form. The private credential fields are not shown.
Our lab selected PHP 8.5 and WordPress 7.1.3. These are the versions actually used for this test, not a promise that future Toolkit releases show the same choices.
4. Review More settings and keep credentials private
Expand More settings when you need to inspect the administrator account, database options, table prefix, cache or subdirectory. WP Toolkit generated strong initial credentials in our test; we retained them instead of enabling weak passwords.
Record the generated username and password privately. The completed installation can show them in its result dialog. Do not include that dialog, database passwords or login tokens in tutorial screenshots. Use a password manager or another secure record for your real site.
We left the subdirectory field empty because this was a separate hostname. Installing into a subdirectory changes the expected website and login URLs. Review the cache option too, especially before later adding an application-level cache plugin.
5. Confirm and wait for completion
Click Confirm once. Wait for website creation and initialization; avoid repeating the action while it is working. The site appeared in Local Manage, and its SSL column progressed from initialization to a certificate lifetime indicator.
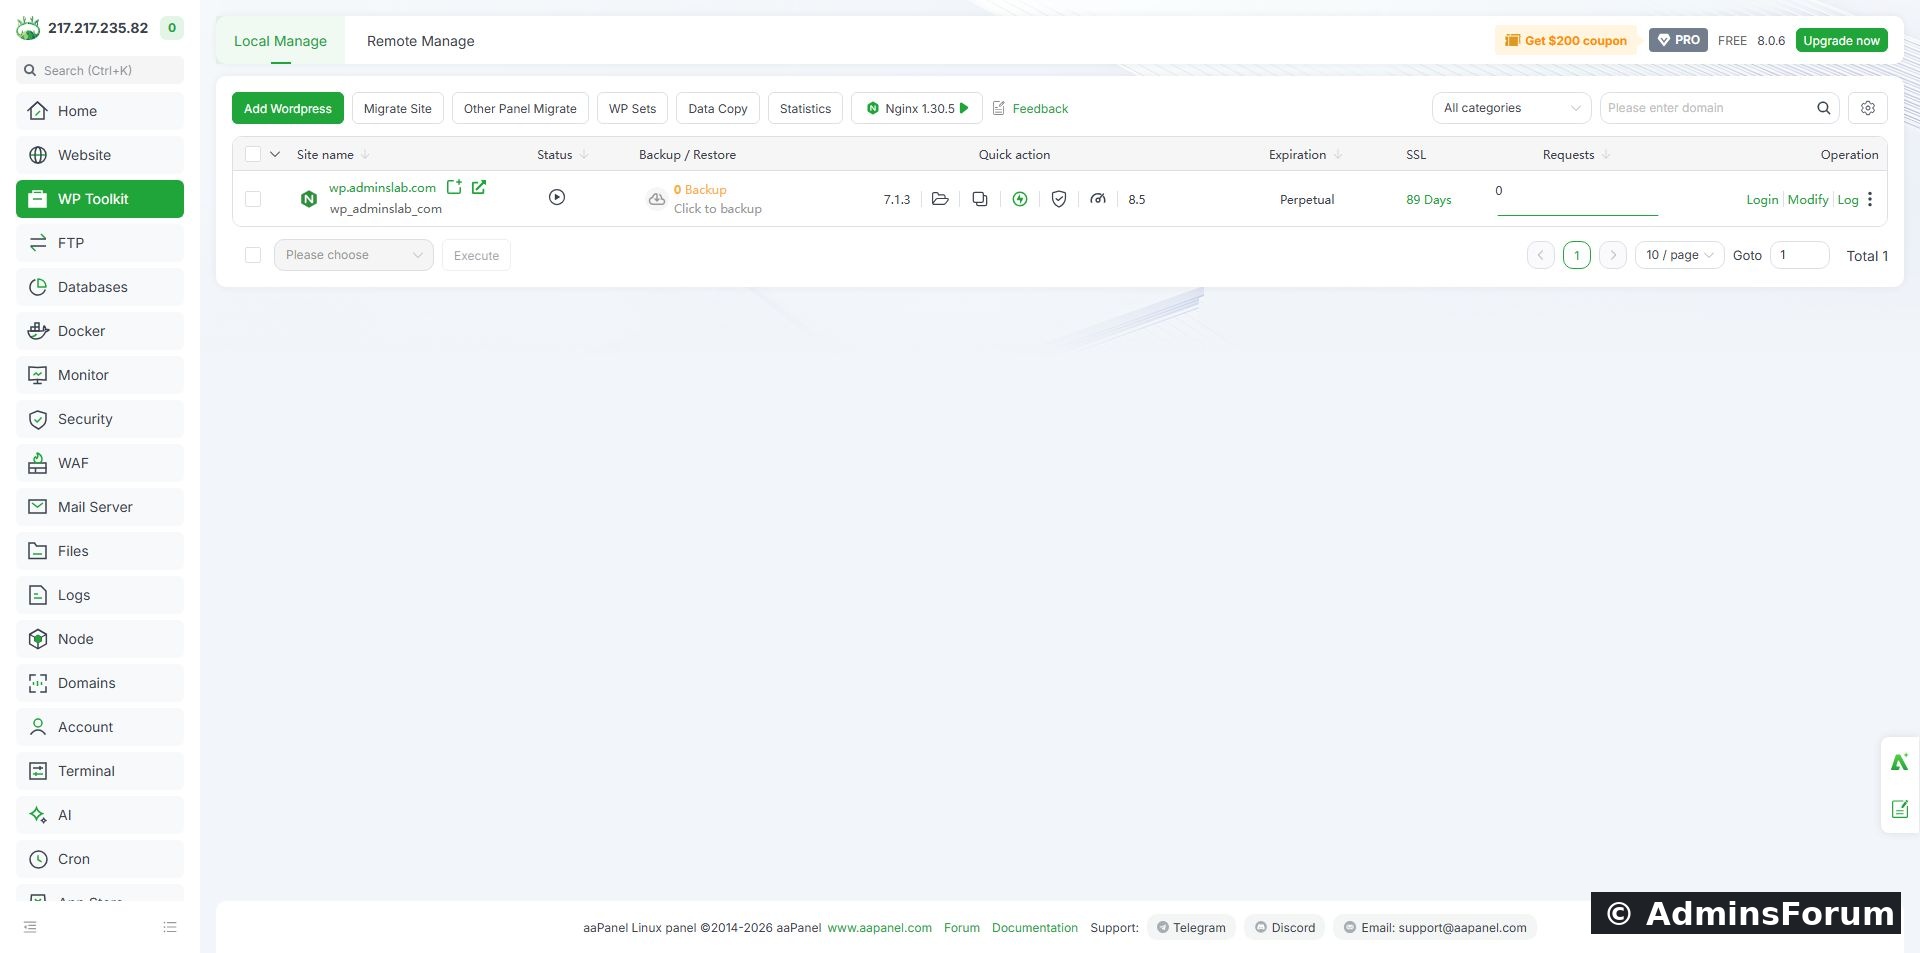
AdminsForum lab: the installed website in WP Toolkit, with WordPress/PHP versions and SSL status.
If creation fails, investigate the site's Log and panel run logs before retrying. Check for an existing domain/directory, missing runtime, database connection error or certificate-validation failure. Do not delete an existing website merely to dismiss an installation error.
6. Verify the public website and HTTPS
Open the site in a browser. Confirm the title and expected WordPress homepage. Check the HTTPS address loads without a certificate warning. In our test, opening HTTP redirected to HTTPS and displayed the new site.
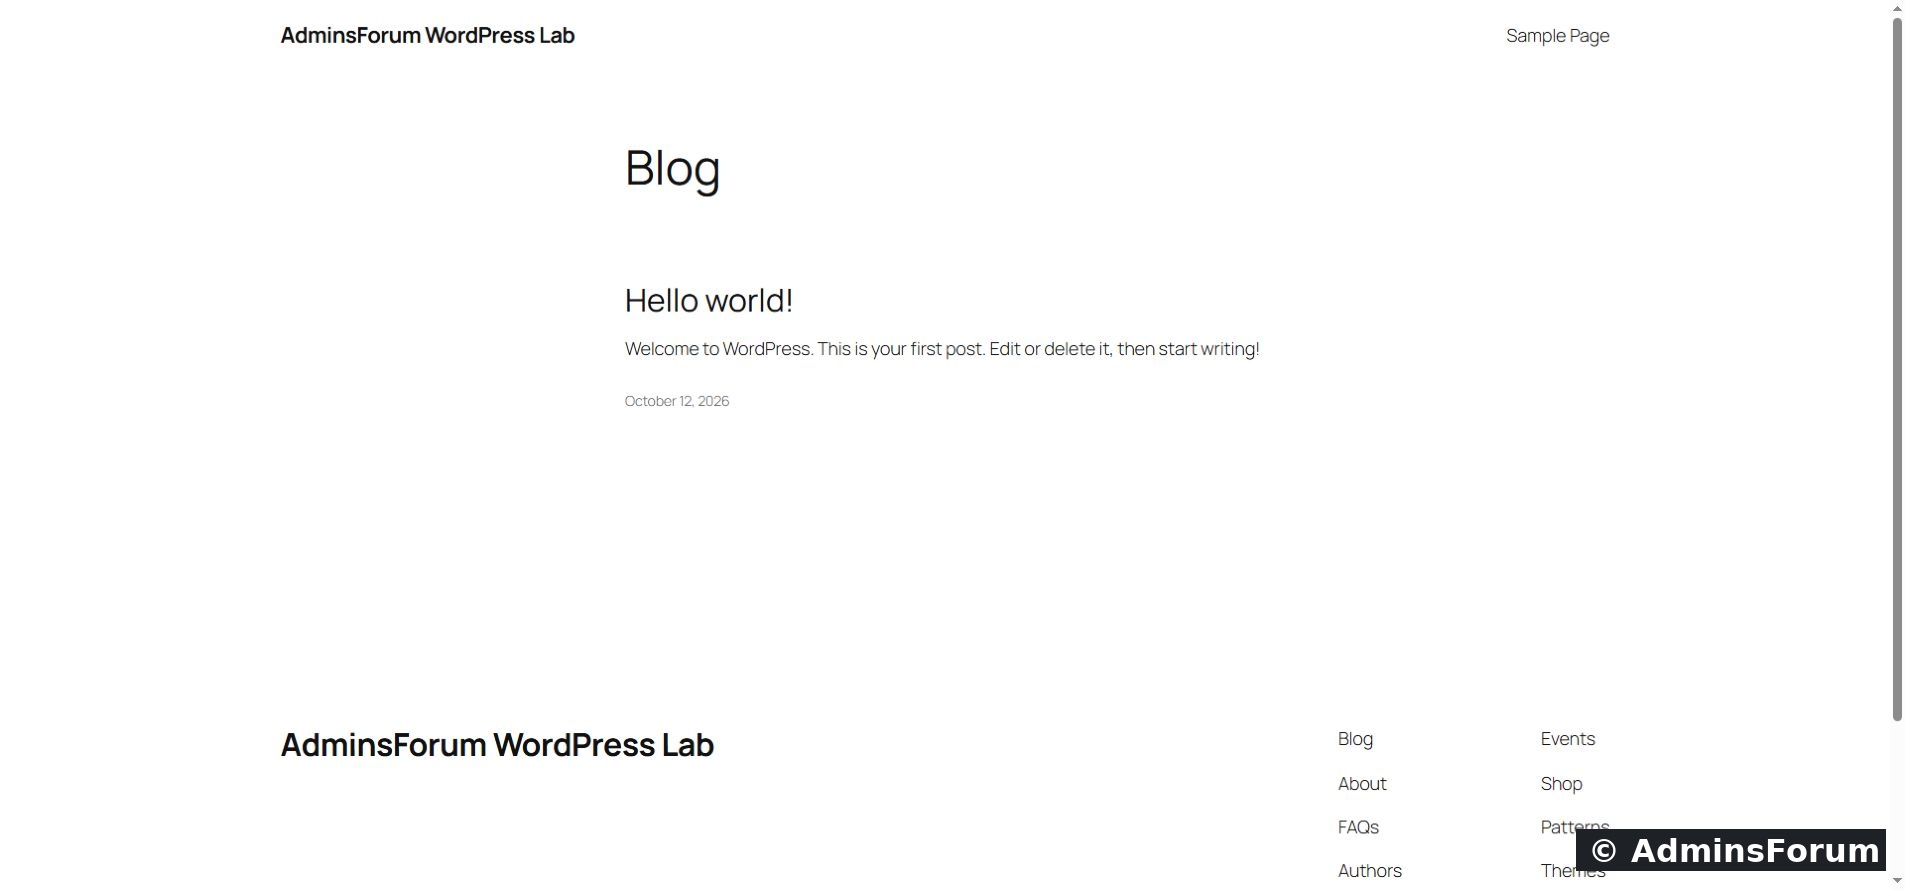
AdminsForum lab: the new WordPress homepage served over HTTPS.
If WordPress loads but SSL did not finish, inspect the SSL status separately. Check DNS, validation accessibility and the certificate's domain. Do not work around a browser certificate warning and call that a successful SSL test.
7. Log in normally on Free Edition
Open your site's /wp-admin address. Enter the generated WordPress username and password and click Log In. Our normal login reached the WordPress dashboard.
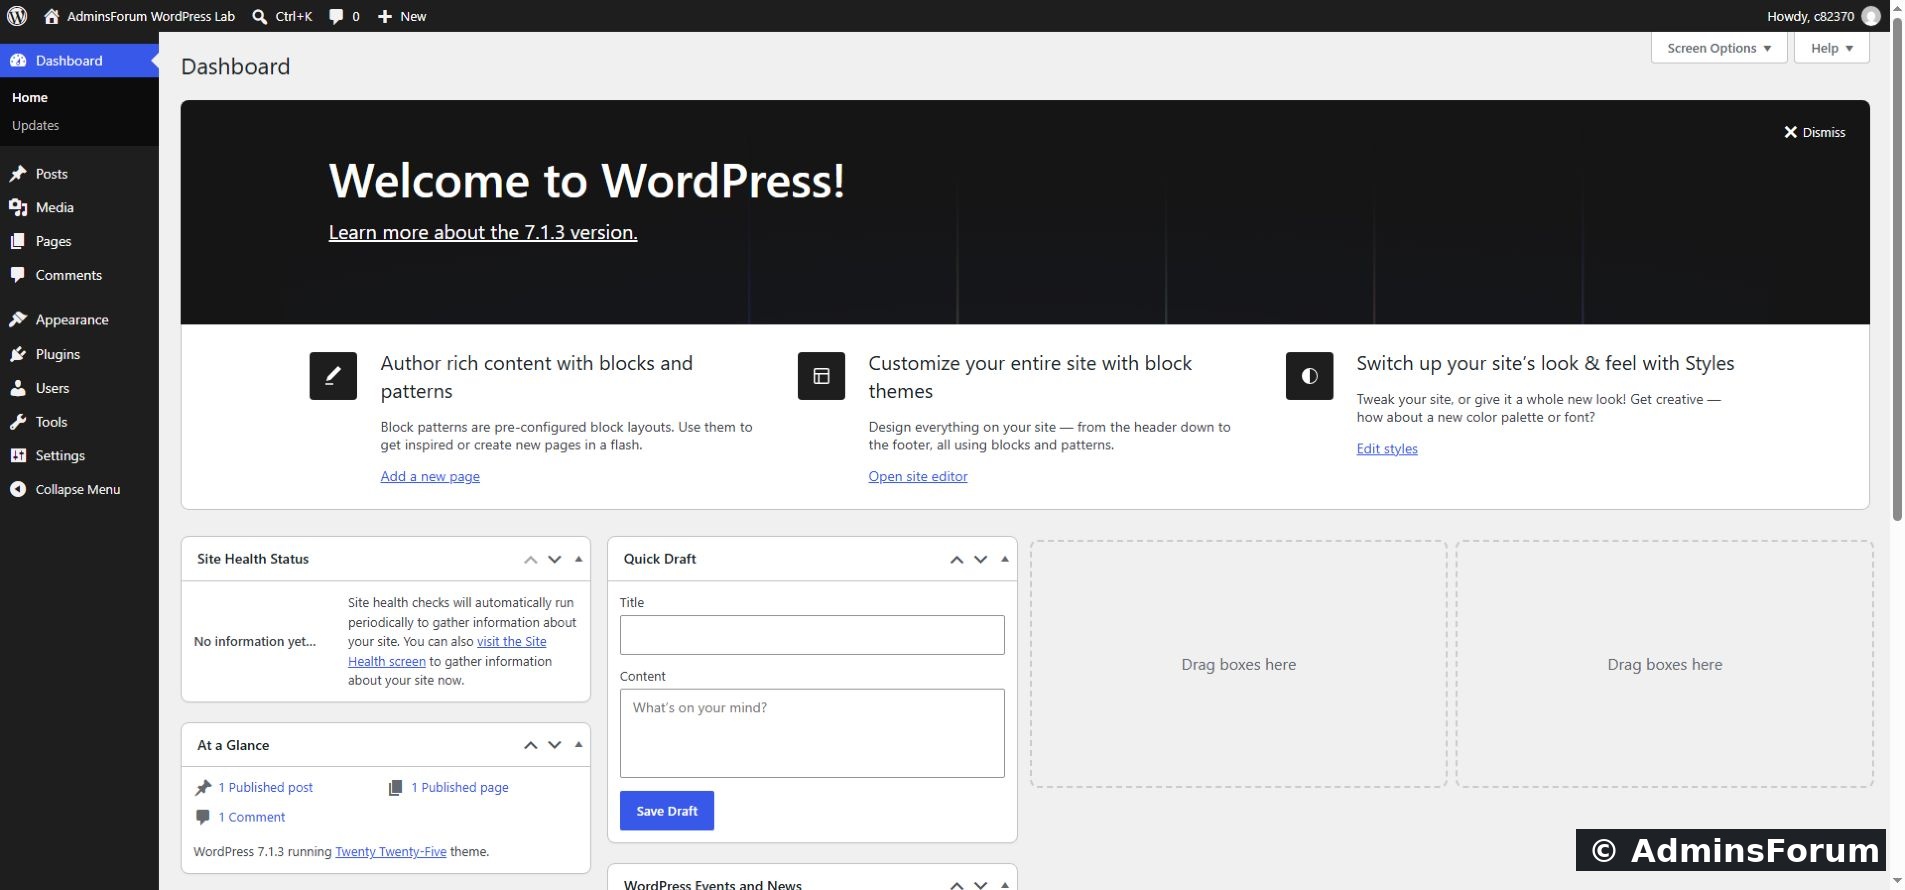
AdminsForum lab: authenticated WordPress dashboard after a successful normal login.
WP Toolkit's Login menu offered both Password-free login and Login. On this Free Edition lab, Password-free login opened a Pro upgrade prompt. We did not purchase an upgrade or claim that feature worked. Normal WordPress login was sufficient to complete the test.
8. Check the first settings and make a backup
Review Settings → General for the title and administrator email. Review Permalinks, update availability and Site Health. Treat any update or plugin installation as a separate operation to check and back up beforehand.
Before building the site further, make a backup and verify what it contains. A WordPress recovery plan needs both website files and the database. See the website backup schedule guide and database backup schedule guide. WP Toolkit's own backup workflow will be covered separately.
Common problems
Completion checklist
Reference: aaPanel official WP Toolkit Local Manage documentation.
Point your domain's A record to the VPS, open WP Toolkit → Add Wordpress, enter the domain, website title and administrator email, choose PHP and WordPress versions, and confirm installation. Check HTTPS and log in at /wp-admin. On our Free Edition lab, password-free login opened a Pro upgrade prompt; normal WordPress login worked.
Tested result
We created a separate website at wp.adminslab.com using aaPanel 8.0.6 Free Edition, Nginx, PHP 8.5 and WordPress 7.1.3. The homepage loaded over HTTPS, HTTP redirected to HTTPS, and normal login reached the authenticated WordPress dashboard. The existing manually installed WordPress site was kept separate.
Before starting
- A working aaPanel installation with a web server, compatible PHP and MySQL/MariaDB.
- A domain or subdomain you control, pointing to the VPS.
- Access to DNS settings and aaPanel. Sign in to your aaPanel vendor account if the Toolkit requires it.
- An administrator email address you can use for the website.
- A fresh site location. Do not reuse an existing website directory without a verified backup and migration plan.
1. Add the domain's DNS record
We used a separate subdomain so the demonstration did not replace our existing site. In Cloudflare → DNS → Records, we added an A record with name wp and the lab VPS address, using DNS only for the initial setup. Use your own server address, not the lab address.
Wait for the domain to resolve to the intended server before applying for SSL. Avoid adding an unrelated AAAA record pointing elsewhere. If you use Cloudflare proxying, review certificate validation and your SSL mode deliberately rather than assuming a certificate is already installed at the origin.
For the DNS setup workflow, see the Cloudflare guides in the Cloudflare section.
2. Open WP Toolkit
In aaPanel's left menu, click WP Toolkit. Use Local Manage for a site hosted on this server, then click Add Wordpress. Select Create site in the dialog.
3. Fill the new-site form
- Domain: enter the website hostname, such as wp.yourdomain.com.
- Apply for SSL: keep this checked when DNS and validation access are ready.
- Website Title: the public WordPress site title; ours was AdminsForum WordPress Lab.
- Email: the website administrator email.
- PHP version: choose an installed version compatible with WordPress and the plugins you intend to use.
- WP version: review the version offered rather than assuming every server shows the same number.
- Language: choose the installation language.
AdminsForum lab: the new-site form. The private credential fields are not shown.
Our lab selected PHP 8.5 and WordPress 7.1.3. These are the versions actually used for this test, not a promise that future Toolkit releases show the same choices.
4. Review More settings and keep credentials private
Expand More settings when you need to inspect the administrator account, database options, table prefix, cache or subdirectory. WP Toolkit generated strong initial credentials in our test; we retained them instead of enabling weak passwords.
Record the generated username and password privately. The completed installation can show them in its result dialog. Do not include that dialog, database passwords or login tokens in tutorial screenshots. Use a password manager or another secure record for your real site.
We left the subdirectory field empty because this was a separate hostname. Installing into a subdirectory changes the expected website and login URLs. Review the cache option too, especially before later adding an application-level cache plugin.
5. Confirm and wait for completion
Click Confirm once. Wait for website creation and initialization; avoid repeating the action while it is working. The site appeared in Local Manage, and its SSL column progressed from initialization to a certificate lifetime indicator.
AdminsForum lab: the installed website in WP Toolkit, with WordPress/PHP versions and SSL status.
If creation fails, investigate the site's Log and panel run logs before retrying. Check for an existing domain/directory, missing runtime, database connection error or certificate-validation failure. Do not delete an existing website merely to dismiss an installation error.
6. Verify the public website and HTTPS
Open the site in a browser. Confirm the title and expected WordPress homepage. Check the HTTPS address loads without a certificate warning. In our test, opening HTTP redirected to HTTPS and displayed the new site.
AdminsForum lab: the new WordPress homepage served over HTTPS.
If WordPress loads but SSL did not finish, inspect the SSL status separately. Check DNS, validation accessibility and the certificate's domain. Do not work around a browser certificate warning and call that a successful SSL test.
7. Log in normally on Free Edition
Open your site's /wp-admin address. Enter the generated WordPress username and password and click Log In. Our normal login reached the WordPress dashboard.
AdminsForum lab: authenticated WordPress dashboard after a successful normal login.
WP Toolkit's Login menu offered both Password-free login and Login. On this Free Edition lab, Password-free login opened a Pro upgrade prompt. We did not purchase an upgrade or claim that feature worked. Normal WordPress login was sufficient to complete the test.
8. Check the first settings and make a backup
Review Settings → General for the title and administrator email. Review Permalinks, update availability and Site Health. Treat any update or plugin installation as a separate operation to check and back up beforehand.
Before building the site further, make a backup and verify what it contains. A WordPress recovery plan needs both website files and the database. See the website backup schedule guide and database backup schedule guide. WP Toolkit's own backup workflow will be covered separately.
Common problems
- Domain cannot be validated: confirm the DNS record and the actual origin serving the hostname.
- PHP choice missing: install a supported runtime first and re-open the form.
- Initialization remains incomplete: read the site and panel logs; do not repeatedly create duplicate sites.
- Password-free login asks for Pro: use normal WordPress login on Free Edition.
- A 502 error: check the assigned PHP runtime, its service status and the web-server/PHP connection.
- Login fails: verify the hostname and saved WordPress credentials. The aaPanel panel password is not the WordPress account password.
Completion checklist
- Domain resolves to the correct VPS.
- New site appears in WP Toolkit.
- Expected WordPress and PHP versions selected.
- Homepage loads and HTTPS is valid.
- Normal WordPress login reaches the dashboard.
- Private credentials kept out of public screenshots.
- Files/database backup and update plan prepared.
Reference: aaPanel official WP Toolkit Local Manage documentation.