



10-12-2026, 05:06 AM
How do you install a WordPress plugin through aaPanel?
Open WP Toolkit, click the WordPress version beside your site, select Plugin, then click Install. Search for the exact plugin, check its author and requirements, and install it. Return to the list and enable its Active switch when you are ready to use it.
We tested installation, activation and deactivation on wp.adminslab.com using aaPanel 8.0.6 Free Edition, WordPress 7.1.3 and PHP 8.5. The example is Hello Dolly by Matt Mullenweg. It is a simple demonstration plugin, not a required component for hosting a website.
Before changing plugins
1. Find the plugin manager
In aaPanel’s left menu choose WP Toolkit. Locate your domain. In the Quick action area, click its WordPress version button. Our button displayed 7.1.3; yours may show a different version.
The Site modification window opens with Wordpress Setting selected. Choose the Plugin tab alongside Base setup, Theme and Utils.
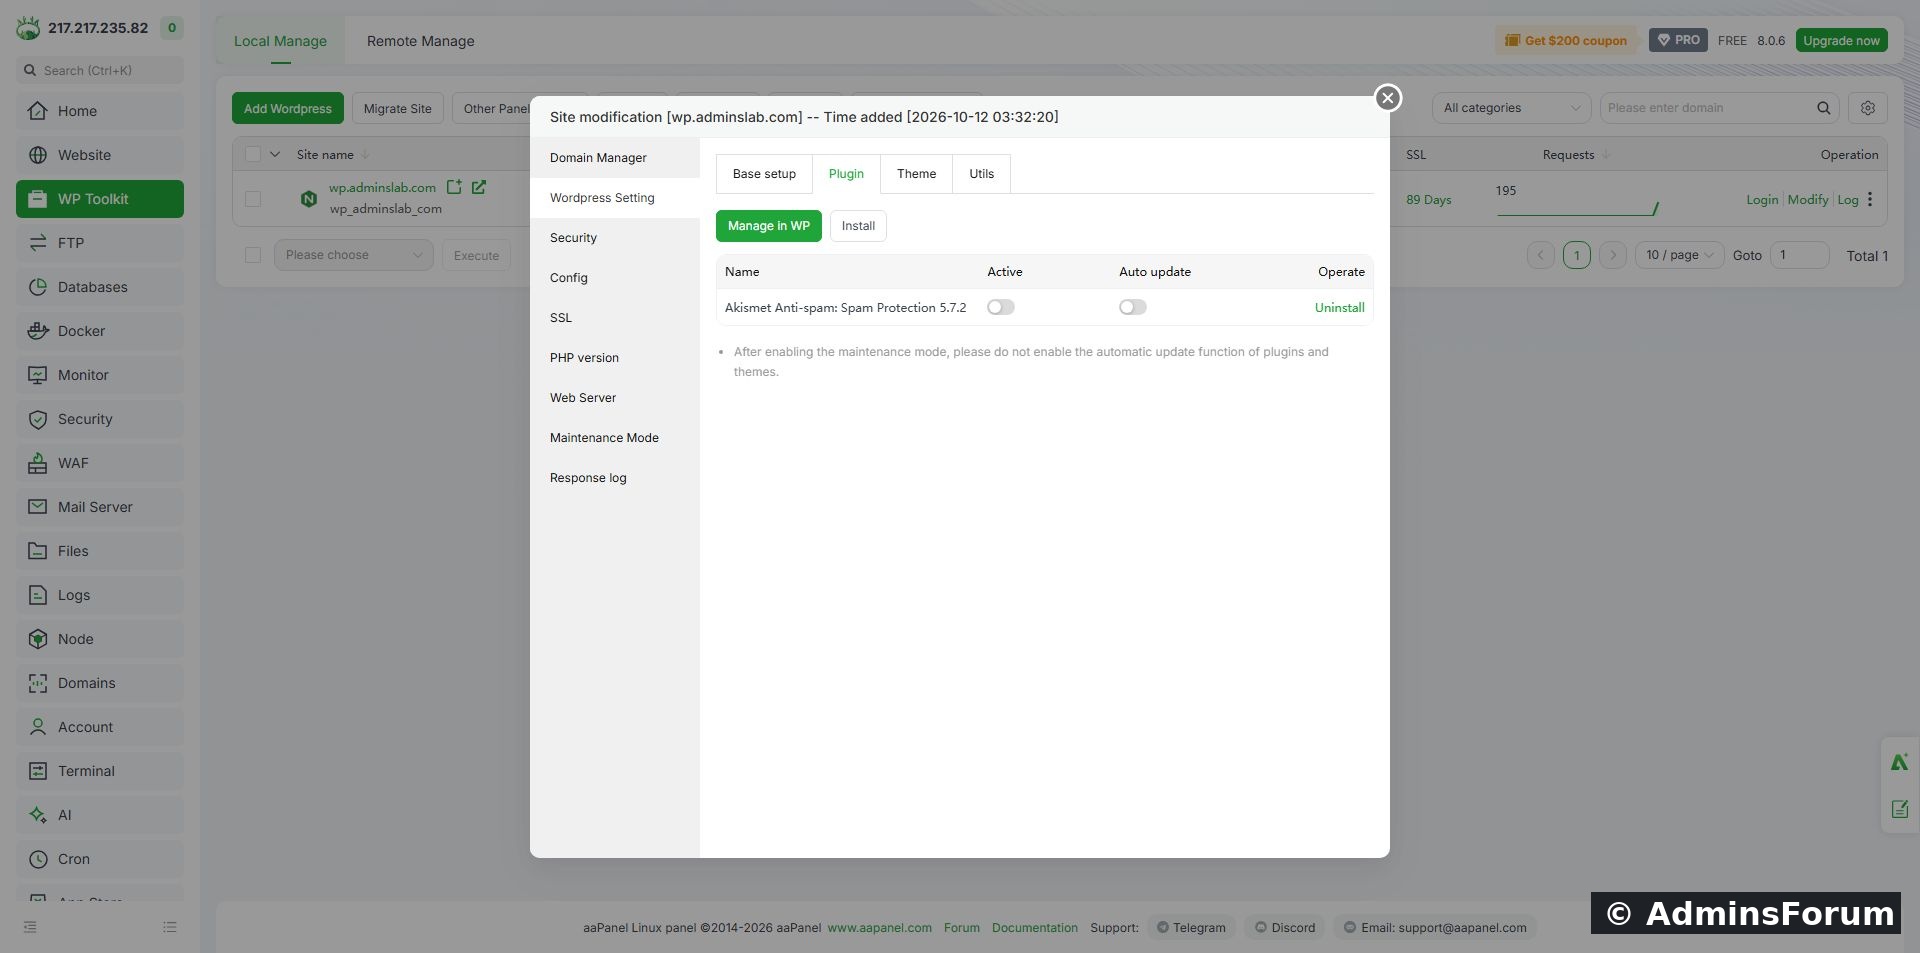
The Plugin tab before our installation. Existing plugins have separate Active and Auto update switches.
2. Understand the two switches
Active controls whether WordPress runs the plugin. An installed plugin can remain inactive.
Auto update controls automatic plugin updates. It is a separate setting: enabling it does not activate a plugin, and activating a plugin does not automatically enable it.
Do not turn on every switch together. Know which setting you are changing and verify it afterward. The panel also warns against enabling automatic plugin/theme updates while its maintenance mode is enabled.
3. Search for a plugin
Click Install. In Install Plugins, enter the plugin name in Please enter plugin name and press Enter. Wait for results to load; the table can briefly show placeholders.
For our demonstration, we searched for Hello Dolly and selected the row with Matt Mullenweg as author. Other similarly named plugins appeared, so we checked the author rather than choosing a random search result.
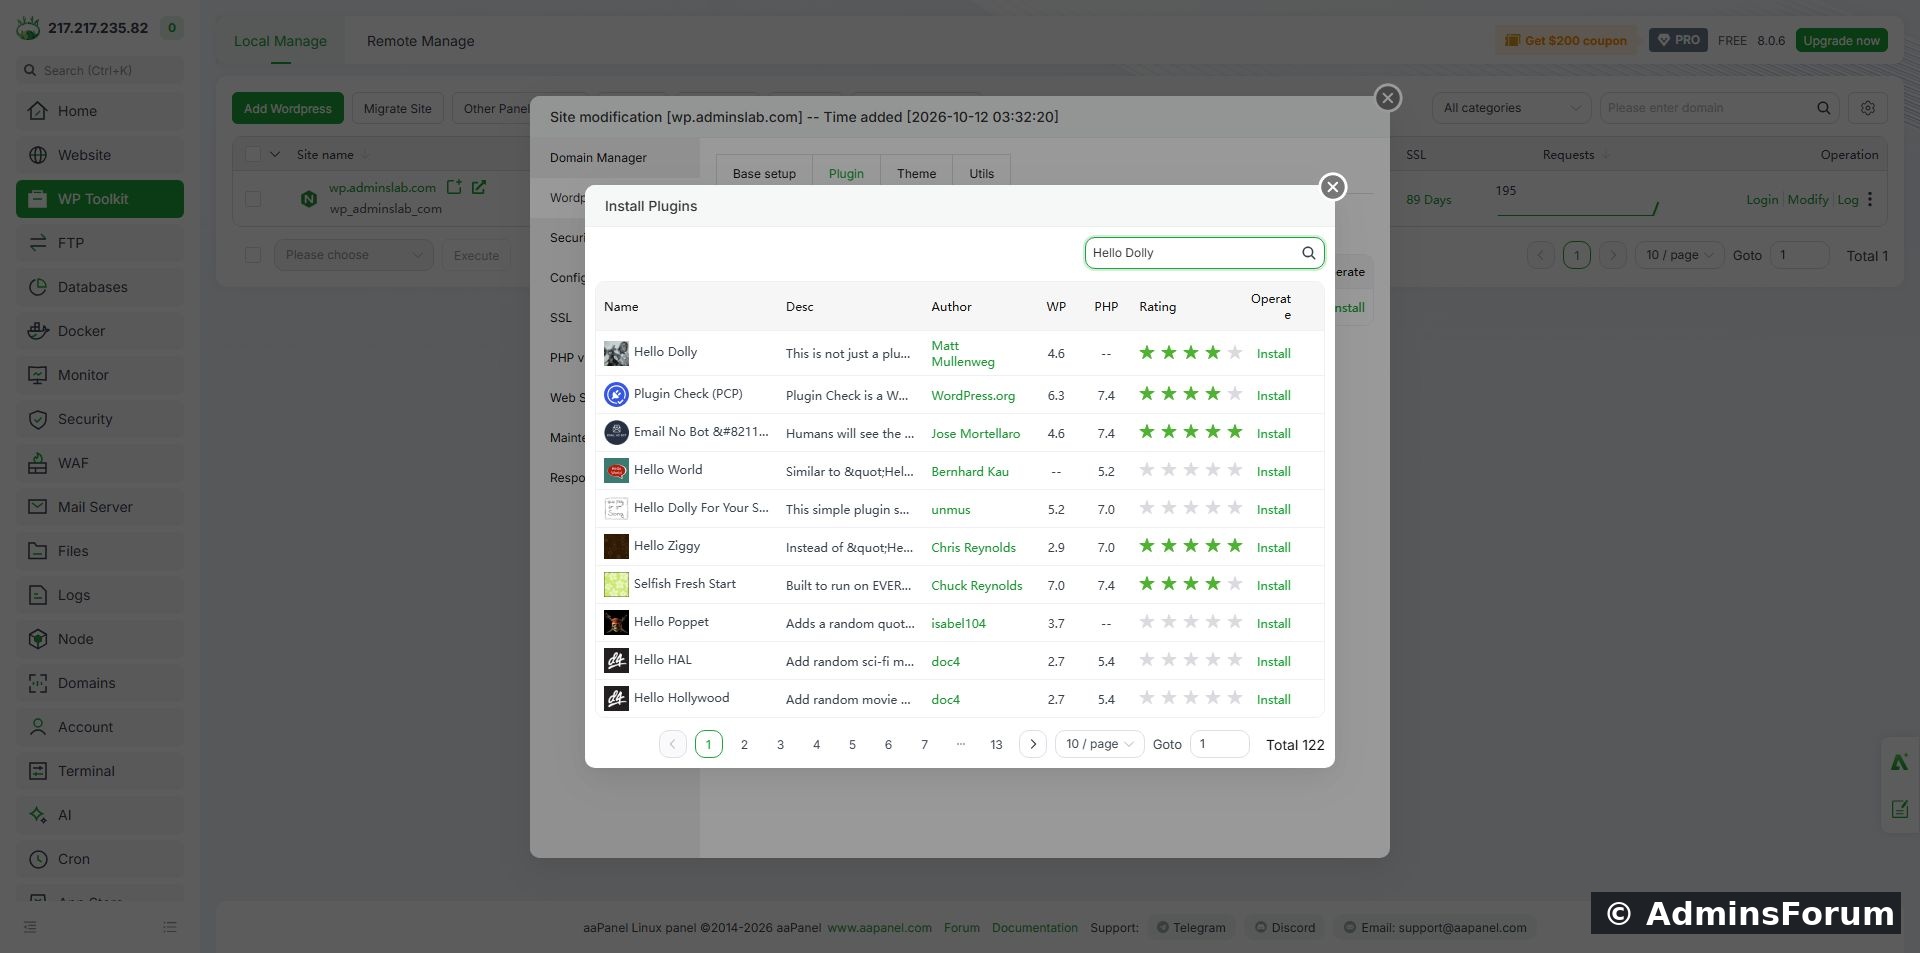
Search results include Name, Desc, Author, WP, PHP, Rating and an Install action. Verify the exact row before proceeding.
The WP and PHP columns are useful requirements information, but do not assume they mean the plugin was tested on your exact installed versions. Review the official WordPress.org listing too. A blank value or dash is not a compatibility guarantee.
4. Install and confirm the result
Click Install in the chosen plugin’s row once. Wait while the panel displays Installing, please wait. Our operation then reported Installation Success.
Close the Install Plugins window using its top-right close control. Keep the underlying Site modification window open. The new plugin should now appear in the Plugin list.
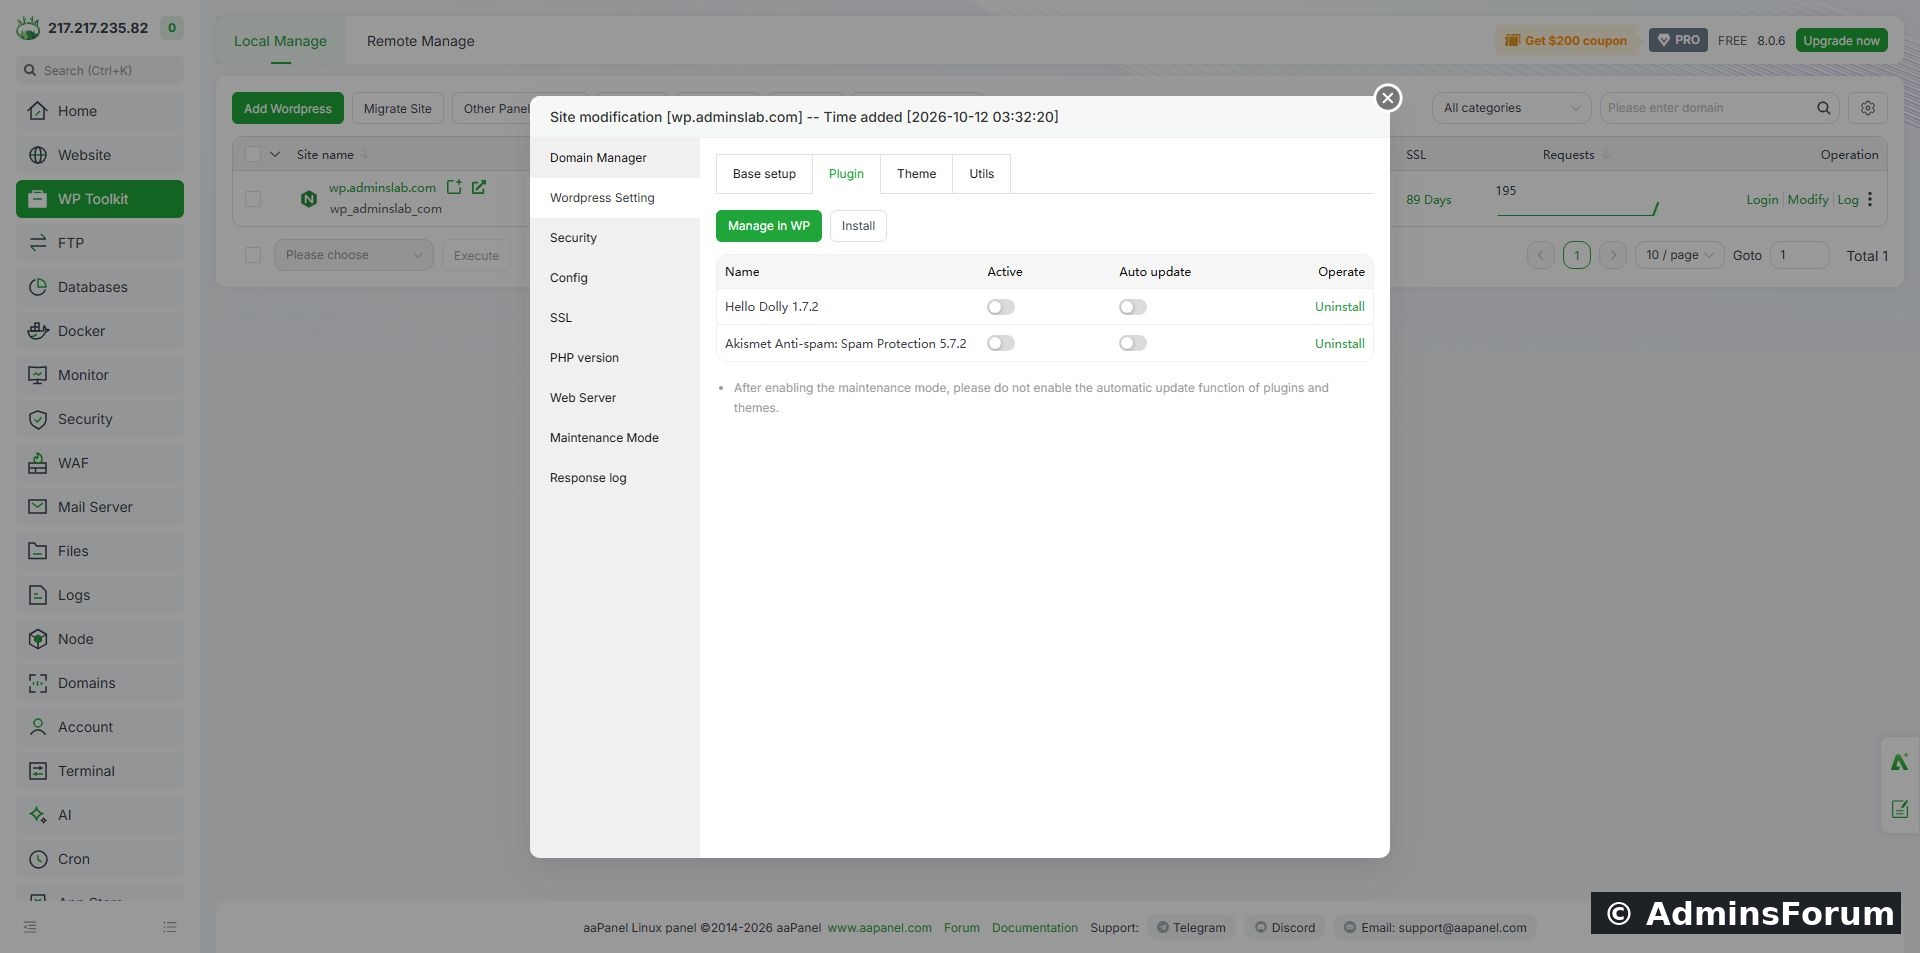
Hello Dolly 1.7.2 appears in the installed list. Both switches were initially off in our test.
Installation and activation are different steps. In our lab, the plugin was installed but inactive. Do not assume that a success message means its functionality is already running.
5. Activate the plugin
Find the newly installed plugin’s row. Turn on the switch in the Active column. Wait for the operation to finish and confirm the switch stays on.
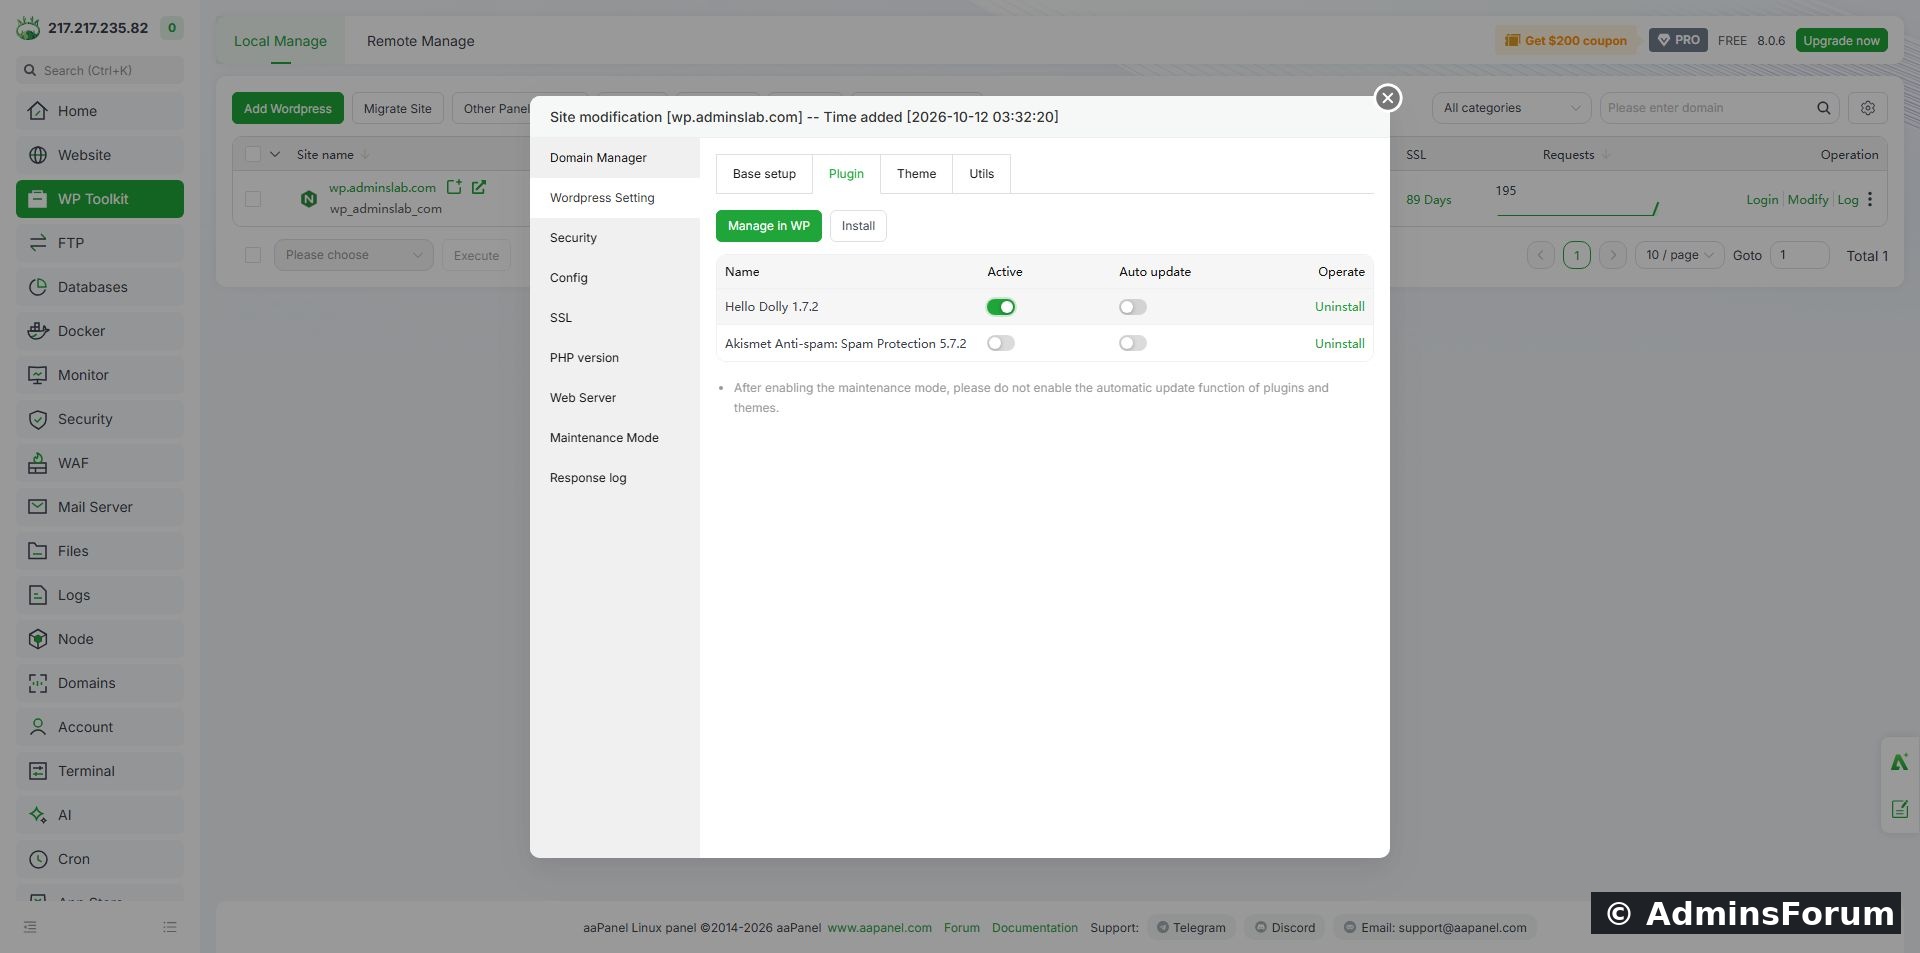
Our activation test: Active is on while Auto update remains off.
Now open your website and its WordPress dashboard. Test the feature you installed and the pages it might affect. For example, a form plugin needs a form submission test; a caching plugin needs a check of pages and logged-in behavior. Our homepage remained accessible after Hello Dolly activation. That basic check does not establish compatibility for every plugin or feature.
Some plugins need additional configuration, an API key or an account inside WordPress. Activation alone does not complete those separate setup steps.
6. Deactivate without uninstalling
To stop a plugin, turn off its Active switch and confirm it stays off. We tested this and left Hello Dolly installed but inactive on the lab site. Its Auto update switch was left off throughout.
Deactivation is different from Uninstall. Uninstall can remove files and, depending on the plugin, stored settings or data. Back up and review the plugin’s removal behavior before using it. We did not test uninstalling or automatic updates in this walkthrough.
If something goes wrong
Finished checklist
References: aaPanel WP Toolkit documentation and Hello Dolly on WordPress.org. Screenshots and installation/activation results are from our AdminsForum lab.
Open WP Toolkit, click the WordPress version beside your site, select Plugin, then click Install. Search for the exact plugin, check its author and requirements, and install it. Return to the list and enable its Active switch when you are ready to use it.
We tested installation, activation and deactivation on wp.adminslab.com using aaPanel 8.0.6 Free Edition, WordPress 7.1.3 and PHP 8.5. The example is Hello Dolly by Matt Mullenweg. It is a simple demonstration plugin, not a required component for hosting a website.
Before changing plugins
- Confirm that you selected the correct website in WP Toolkit.
- Take a fresh backup of files and the database. See Back Up WordPress with aaPanel WP Toolkit. Keep a verified off-server copy for recovery.
- For a live website, test changes on staging first and choose a quiet maintenance period.
- Check the plugin’s official listing, recent maintenance, WordPress/PHP compatibility and author. A similar name does not mean it is the same plugin.
1. Find the plugin manager
In aaPanel’s left menu choose WP Toolkit. Locate your domain. In the Quick action area, click its WordPress version button. Our button displayed 7.1.3; yours may show a different version.
The Site modification window opens with Wordpress Setting selected. Choose the Plugin tab alongside Base setup, Theme and Utils.
The Plugin tab before our installation. Existing plugins have separate Active and Auto update switches.
2. Understand the two switches
Active controls whether WordPress runs the plugin. An installed plugin can remain inactive.
Auto update controls automatic plugin updates. It is a separate setting: enabling it does not activate a plugin, and activating a plugin does not automatically enable it.
Do not turn on every switch together. Know which setting you are changing and verify it afterward. The panel also warns against enabling automatic plugin/theme updates while its maintenance mode is enabled.
3. Search for a plugin
Click Install. In Install Plugins, enter the plugin name in Please enter plugin name and press Enter. Wait for results to load; the table can briefly show placeholders.
For our demonstration, we searched for Hello Dolly and selected the row with Matt Mullenweg as author. Other similarly named plugins appeared, so we checked the author rather than choosing a random search result.
Search results include Name, Desc, Author, WP, PHP, Rating and an Install action. Verify the exact row before proceeding.
The WP and PHP columns are useful requirements information, but do not assume they mean the plugin was tested on your exact installed versions. Review the official WordPress.org listing too. A blank value or dash is not a compatibility guarantee.
4. Install and confirm the result
Click Install in the chosen plugin’s row once. Wait while the panel displays Installing, please wait. Our operation then reported Installation Success.
Close the Install Plugins window using its top-right close control. Keep the underlying Site modification window open. The new plugin should now appear in the Plugin list.
Hello Dolly 1.7.2 appears in the installed list. Both switches were initially off in our test.
Installation and activation are different steps. In our lab, the plugin was installed but inactive. Do not assume that a success message means its functionality is already running.
5. Activate the plugin
Find the newly installed plugin’s row. Turn on the switch in the Active column. Wait for the operation to finish and confirm the switch stays on.
Our activation test: Active is on while Auto update remains off.
Now open your website and its WordPress dashboard. Test the feature you installed and the pages it might affect. For example, a form plugin needs a form submission test; a caching plugin needs a check of pages and logged-in behavior. Our homepage remained accessible after Hello Dolly activation. That basic check does not establish compatibility for every plugin or feature.
Some plugins need additional configuration, an API key or an account inside WordPress. Activation alone does not complete those separate setup steps.
6. Deactivate without uninstalling
To stop a plugin, turn off its Active switch and confirm it stays off. We tested this and left Hello Dolly installed but inactive on the lab site. Its Auto update switch was left off throughout.
Deactivation is different from Uninstall. Uninstall can remove files and, depending on the plugin, stored settings or data. Back up and review the plugin’s removal behavior before using it. We did not test uninstalling or automatic updates in this walkthrough.
If something goes wrong
- Search results stay blank: wait for loading to finish, check the panel session and retry a precise name. Investigate server access to the plugin source if searches consistently fail.
- Installation fails: read the error, check disk space and file permissions, and verify that PHP can access the required resources. Avoid changing ownership broadly without understanding the error.
- Activation breaks a feature: switch that plugin off, check the website again and inspect the relevant WordPress/PHP logs. Do not update several unrelated plugins while isolating the problem.
- An edition upgrade prompt appears: use normal WordPress dashboard access where appropriate. Our Plugin install and Active switches worked in Free Edition; password-free Login was separately Pro-gated in the earlier installation test.
Finished checklist
- Correct website and exact plugin author checked.
- Backup prepared before changes.
- Installation success confirmed by the plugin appearing in the list.
- Active state checked separately from Auto update.
- Website and affected functionality tested.
- Unneeded demonstration plugin left inactive.
References: aaPanel WP Toolkit documentation and Hello Dolly on WordPress.org. Screenshots and installation/activation results are from our AdminsForum lab.