



10-12-2026, 05:36 AM
How do you check WordPress Site Health on aaPanel?
Sign in to WordPress and choose Tools → Site Health. Wait for the checks to finish, open each finding to read its details, then use Info to inspect the site’s actual configuration. You do not need to install a separate health-check plugin to use this built-in screen.
We inspected our wp.adminslab.com test website, hosted through aaPanel 8.0.6 Free Edition. This guide shows actual findings from WordPress 7.1.3 on PHP 8.5.11. Your report can differ according to your server, plugins and recent activity.
1. Open Site Health and wait for the result
Use your normal WordPress administrator login. In the left menu choose Tools → Site Health. You can also reach the screen from a dashboard Site Health link if it is displayed.
The page initially showed Results are still loading in our session. Wait until checks finish before judging the report. Some tests depend on requests that take longer than the initial page load.
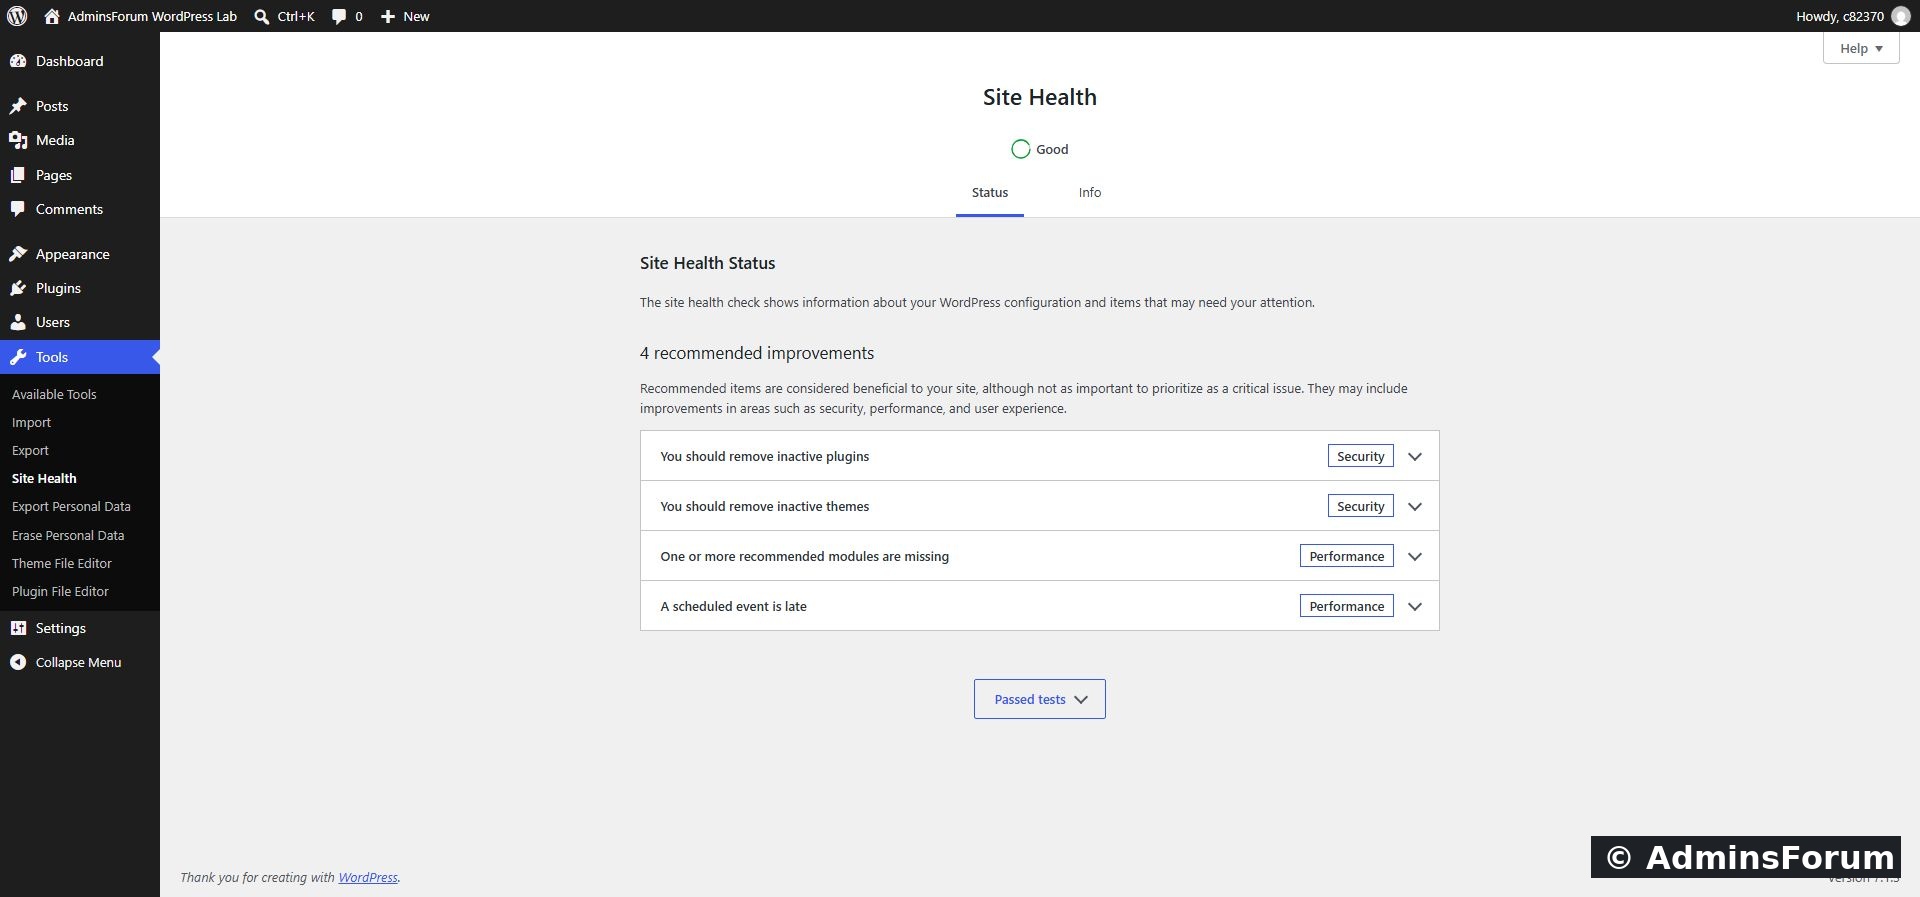
Our finished Status screen: Good, with four recommended improvements.
2. Read the findings rather than just the summary label
Open the Status tab. Review any critical issues first, followed by recommended improvements. A Good label does not mean that every possible problem has been ruled out or that the website has passed a complete security audit.
Our report showed:
We had just completed plugin and theme demonstrations, so the inactive items were expected on this lab. For a real website, review which items are still needed, preserve any required parent/fallback theme and back up before removal. Do not delete components purely to change a score.
3. Expand a finding to see the specific cause
Click a recommendation’s heading. We opened One or more recommended modules are missing. It identified exif and imagick as optional modules that were absent or disabled.
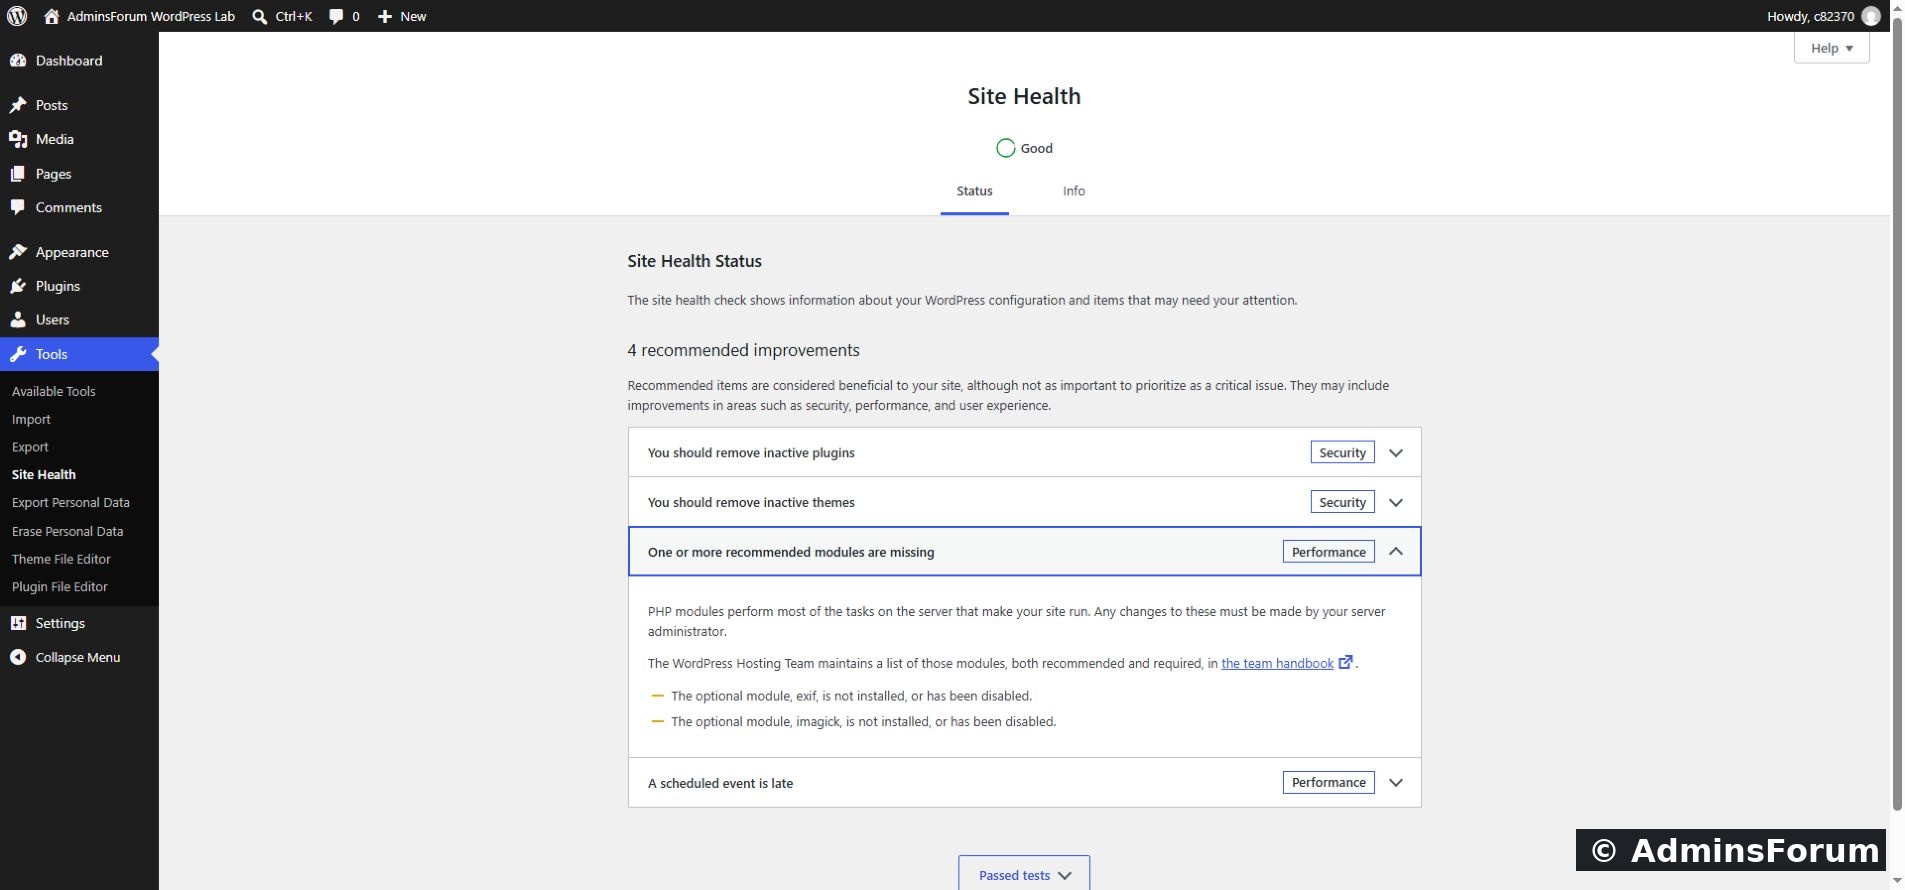
The expanded finding identifies the exact optional PHP modules.
That message does not say PHP itself is missing. It concerns extensions available to the PHP environment running this website. Installing an extension for another PHP version will not necessarily resolve the warning.
If you plan to change extensions in aaPanel, first confirm the website’s PHP version, read the extension requirements and prepare for the relevant PHP service reload/restart. Verify the result through WordPress afterward. We did not install EXIF or Imagick during this diagnostic walkthrough.
4. Inspect the late scheduled-event warning separately
A late event deserves its own investigation. Expand the item and record the event name and any explanation shown. Check whether the warning persists and whether the affected application task is completing.
Do not immediately add a server cron job or disable WordPress’s scheduler simply because a warning appears. Review the existing scheduler configuration first so you avoid duplicate or conflicting jobs. This guide did not diagnose or fix the event on the lab and did not create a new cron task.
5. Use Info to check real configuration details
Choose Info at the top. It contains expandable sections such as WordPress, themes, plugins, Media Handling, Server, Database and Filesystem Permissions.
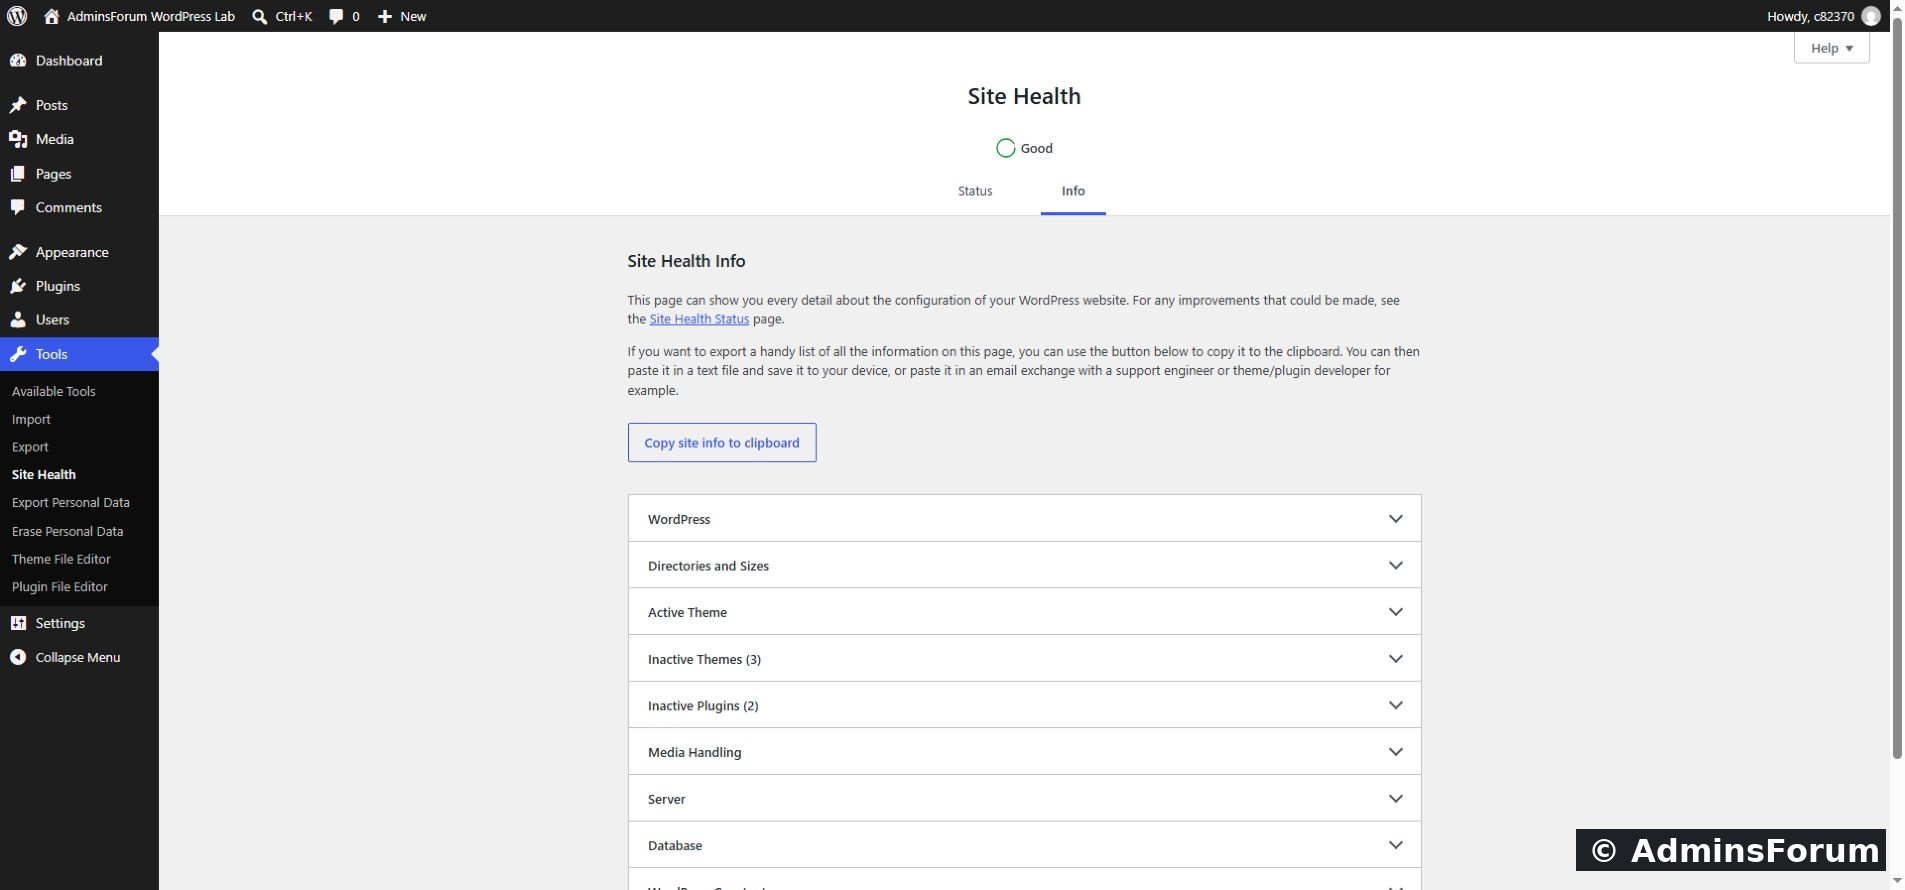
The Info tab groups technical details into sections. Open only the section relevant to your question.
We opened Server and confirmed that the website was using PHP 8.5.11 with fpm-fcgi and nginx/1.30.5. These values come from WordPress’s runtime and are useful when aaPanel has several PHP versions installed.
The same section reported upload and memory limits. Read them before requesting a change: an administrator-screen memory allowance can differ from the general PHP memory limit. The Info page reports configuration; it does not apply new settings itself.
6. Gather a useful support question
For help, include the exact expanded error, WordPress version, the website’s PHP version, the affected component and what changed before the issue started. Add the relevant screenshot rather than an unexplained Good or Needs improvement label.
The Copy site info to clipboard control can collect a broader report, but review it before sharing. Configuration exports may contain server paths, database identifiers, usernames or details you do not need to publish. Share the smallest relevant excerpt and remove credentials, tokens and private information. We did not post a full configuration export.
For WordPress-specific questions, use WordPress Support. For an extension issue, PHP & Extensions Support is the more focused section.
7. Recheck after making a separate fix
Change one relevant item at a time, then return to Site Health and let the tests complete. Also test the actual feature that was failing. A warning disappearing does not replace a functional check of uploads, email, forms or scheduled tasks.
Keep a note of the before/after finding and the exact change. This makes later troubleshooting easier than applying several unrelated settings and losing track of which one helped.
What we verified
We opened Status, waited for completion, expanded the optional-module warning and inspected Info → Server. The lab reported Good with four recommendations. We did not remove plugins/themes, install optional modules or resolve the scheduled-event warning in this guide.
Source: WordPress Site Health documentation. Screenshots and runtime findings are from our AdminsForum lab.
Sign in to WordPress and choose Tools → Site Health. Wait for the checks to finish, open each finding to read its details, then use Info to inspect the site’s actual configuration. You do not need to install a separate health-check plugin to use this built-in screen.
We inspected our wp.adminslab.com test website, hosted through aaPanel 8.0.6 Free Edition. This guide shows actual findings from WordPress 7.1.3 on PHP 8.5.11. Your report can differ according to your server, plugins and recent activity.
1. Open Site Health and wait for the result
Use your normal WordPress administrator login. In the left menu choose Tools → Site Health. You can also reach the screen from a dashboard Site Health link if it is displayed.
The page initially showed Results are still loading in our session. Wait until checks finish before judging the report. Some tests depend on requests that take longer than the initial page load.
Our finished Status screen: Good, with four recommended improvements.
2. Read the findings rather than just the summary label
Open the Status tab. Review any critical issues first, followed by recommended improvements. A Good label does not mean that every possible problem has been ruled out or that the website has passed a complete security audit.
Our report showed:
- You should remove inactive plugins.
- You should remove inactive themes.
- One or more recommended modules are missing.
- A scheduled event is late.
We had just completed plugin and theme demonstrations, so the inactive items were expected on this lab. For a real website, review which items are still needed, preserve any required parent/fallback theme and back up before removal. Do not delete components purely to change a score.
3. Expand a finding to see the specific cause
Click a recommendation’s heading. We opened One or more recommended modules are missing. It identified exif and imagick as optional modules that were absent or disabled.
The expanded finding identifies the exact optional PHP modules.
That message does not say PHP itself is missing. It concerns extensions available to the PHP environment running this website. Installing an extension for another PHP version will not necessarily resolve the warning.
If you plan to change extensions in aaPanel, first confirm the website’s PHP version, read the extension requirements and prepare for the relevant PHP service reload/restart. Verify the result through WordPress afterward. We did not install EXIF or Imagick during this diagnostic walkthrough.
4. Inspect the late scheduled-event warning separately
A late event deserves its own investigation. Expand the item and record the event name and any explanation shown. Check whether the warning persists and whether the affected application task is completing.
Do not immediately add a server cron job or disable WordPress’s scheduler simply because a warning appears. Review the existing scheduler configuration first so you avoid duplicate or conflicting jobs. This guide did not diagnose or fix the event on the lab and did not create a new cron task.
5. Use Info to check real configuration details
Choose Info at the top. It contains expandable sections such as WordPress, themes, plugins, Media Handling, Server, Database and Filesystem Permissions.
The Info tab groups technical details into sections. Open only the section relevant to your question.
We opened Server and confirmed that the website was using PHP 8.5.11 with fpm-fcgi and nginx/1.30.5. These values come from WordPress’s runtime and are useful when aaPanel has several PHP versions installed.
The same section reported upload and memory limits. Read them before requesting a change: an administrator-screen memory allowance can differ from the general PHP memory limit. The Info page reports configuration; it does not apply new settings itself.
6. Gather a useful support question
For help, include the exact expanded error, WordPress version, the website’s PHP version, the affected component and what changed before the issue started. Add the relevant screenshot rather than an unexplained Good or Needs improvement label.
The Copy site info to clipboard control can collect a broader report, but review it before sharing. Configuration exports may contain server paths, database identifiers, usernames or details you do not need to publish. Share the smallest relevant excerpt and remove credentials, tokens and private information. We did not post a full configuration export.
For WordPress-specific questions, use WordPress Support. For an extension issue, PHP & Extensions Support is the more focused section.
7. Recheck after making a separate fix
Change one relevant item at a time, then return to Site Health and let the tests complete. Also test the actual feature that was failing. A warning disappearing does not replace a functional check of uploads, email, forms or scheduled tasks.
Keep a note of the before/after finding and the exact change. This makes later troubleshooting easier than applying several unrelated settings and losing track of which one helped.
What we verified
We opened Status, waited for completion, expanded the optional-module warning and inspected Info → Server. The lab reported Good with four recommendations. We did not remove plugins/themes, install optional modules or resolve the scheduled-event warning in this guide.
Source: WordPress Site Health documentation. Screenshots and runtime findings are from our AdminsForum lab.