



10-12-2026, 12:46 PM
How do you upload an image to WordPress on aaPanel?
Use WordPress → Media → Add Media File, select your image and wait for the upload to finish. Open Edit to add a meaningful title, alternative text and caption, then save and verify the file URL. You do not need to open aaPanel’s file manager for an ordinary WordPress media upload.
We tested this on our aaPanel-hosted wp.adminslab.com website running WordPress 7.1.3 and PHP 8.5.11. The JPEG upload, attachment details and direct HTTPS image URL were verified.
1. Prepare the image
Use an image you have permission to publish. Give it a clear filename before uploading and choose dimensions appropriate for its purpose. Avoid uploading camera originals when a smaller image will do. Review screenshots for passwords, tokens, private messages and other information that should not become public.
For this demonstration we used our own AdminsForum-branded Site Health screenshot. A copyright mark identifies the source; it does not prevent someone from copying the file.
2. Open the uploader
Sign in to your WordPress administrator dashboard and select Media → Add Media File. Our screen offered Select Files and displayed a 50 MB maximum upload size.
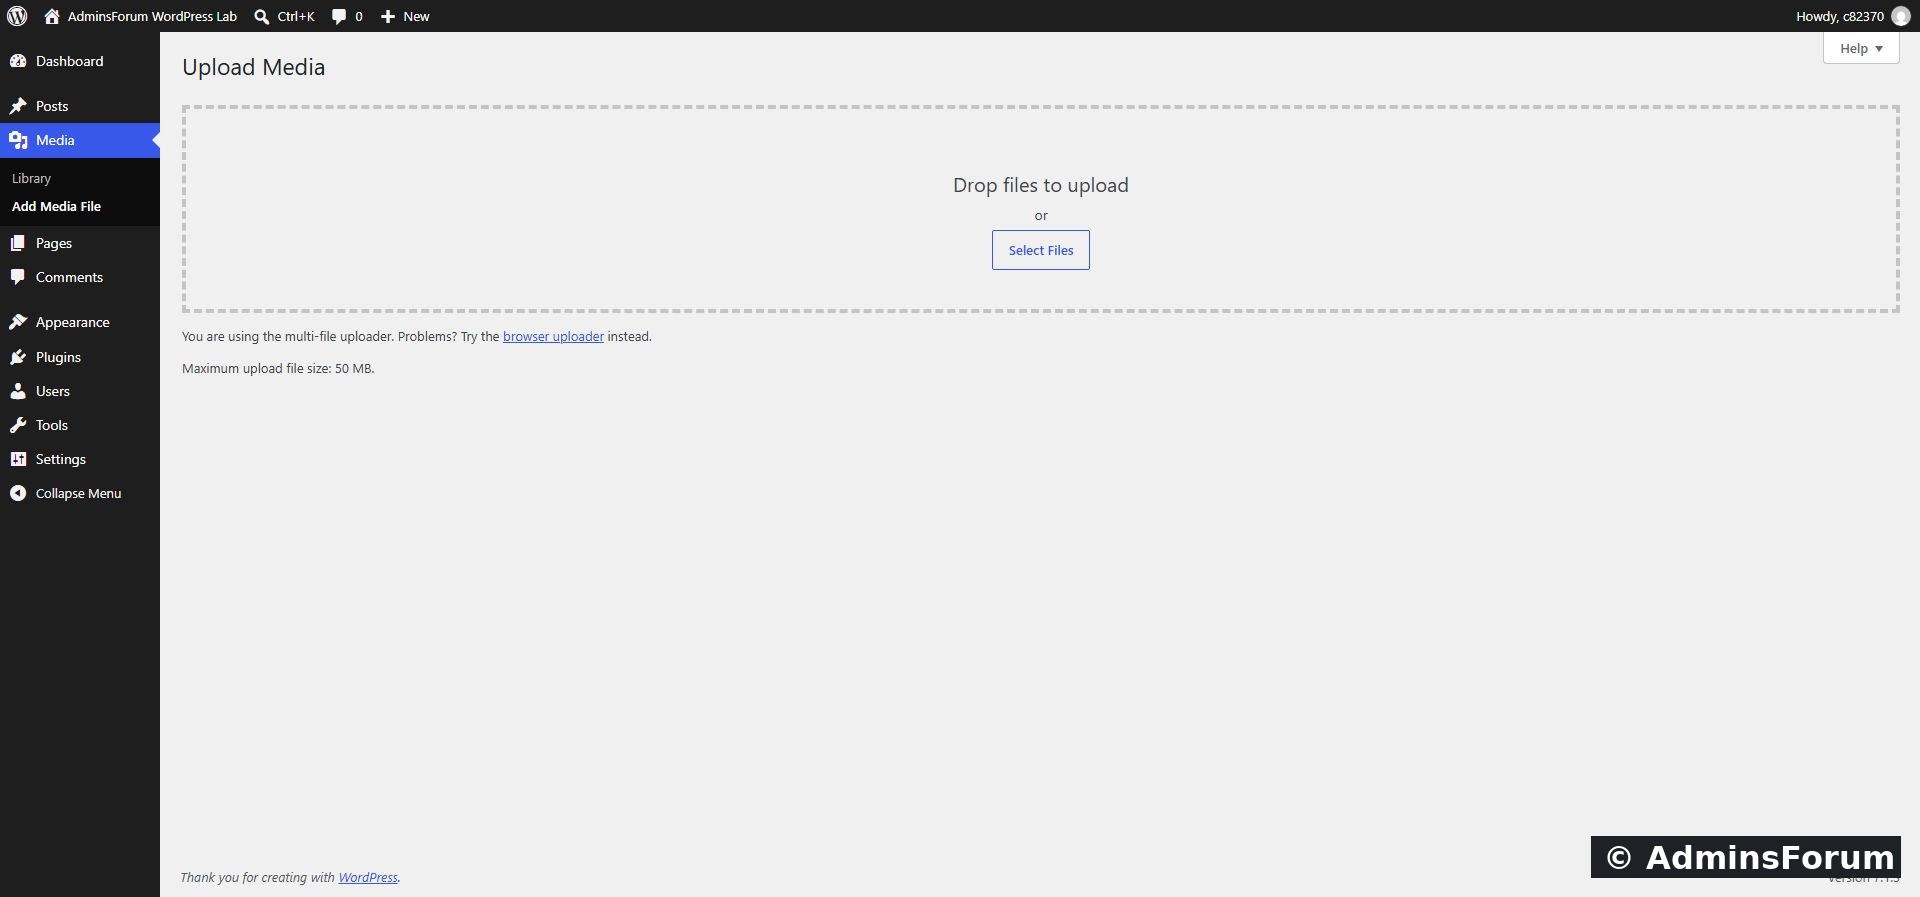
WordPress’s upload screen on our lab. Your server may have a different limit.
The number is a maximum, not a target image size. Small, appropriately sized images usually transfer more efficiently than large originals. If your file exceeds the limit, optimize it first or review the website’s PHP configuration rather than assuming WordPress is broken.
3. Select and upload the file
Click Select Files and choose your image. Wait for the upload to complete. Do not close the tab while progress is running or retry repeatedly before the original operation finishes.
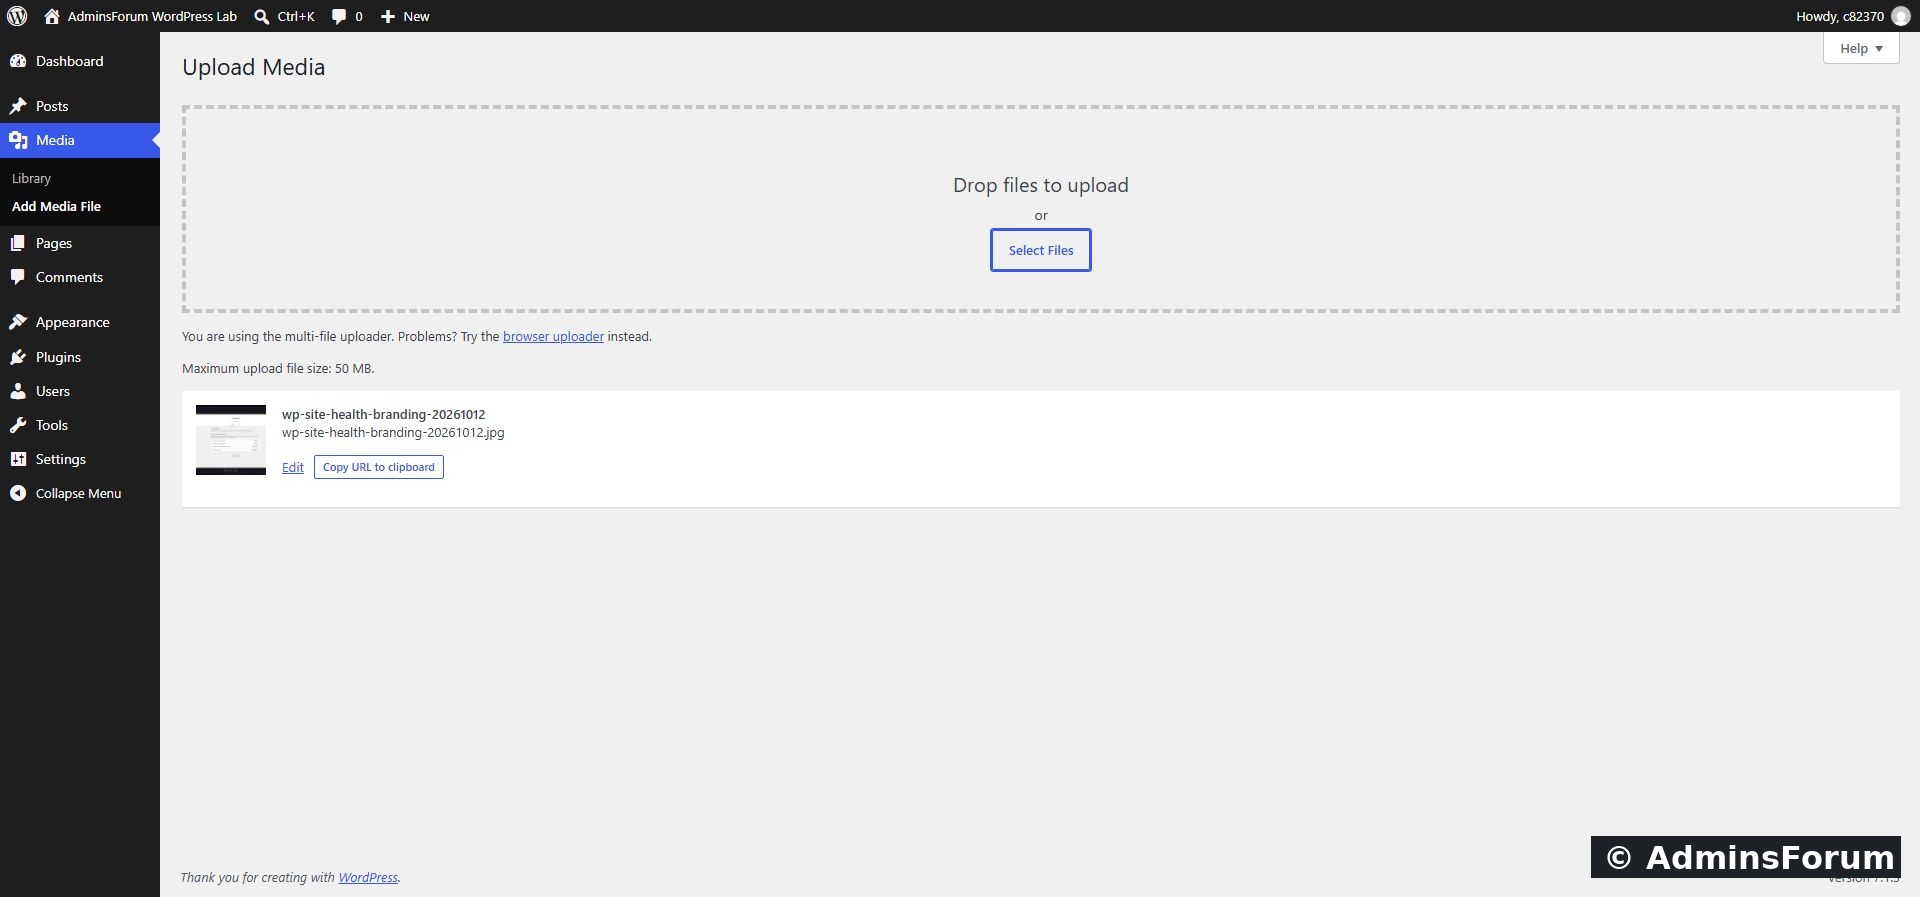
Our uploaded file appears with Edit and Copy URL to clipboard actions.
If the normal uploader fails, the screen also offers a browser uploader. That is an alternative upload interface, not a way to bypass server limits or file-type restrictions.
4. Add useful attachment details
Click Edit next to the uploaded file. On Edit Media, review:
We set a readable title, described the visible Site Health result in Alternative Text and added a short lab caption. Then we clicked Update.
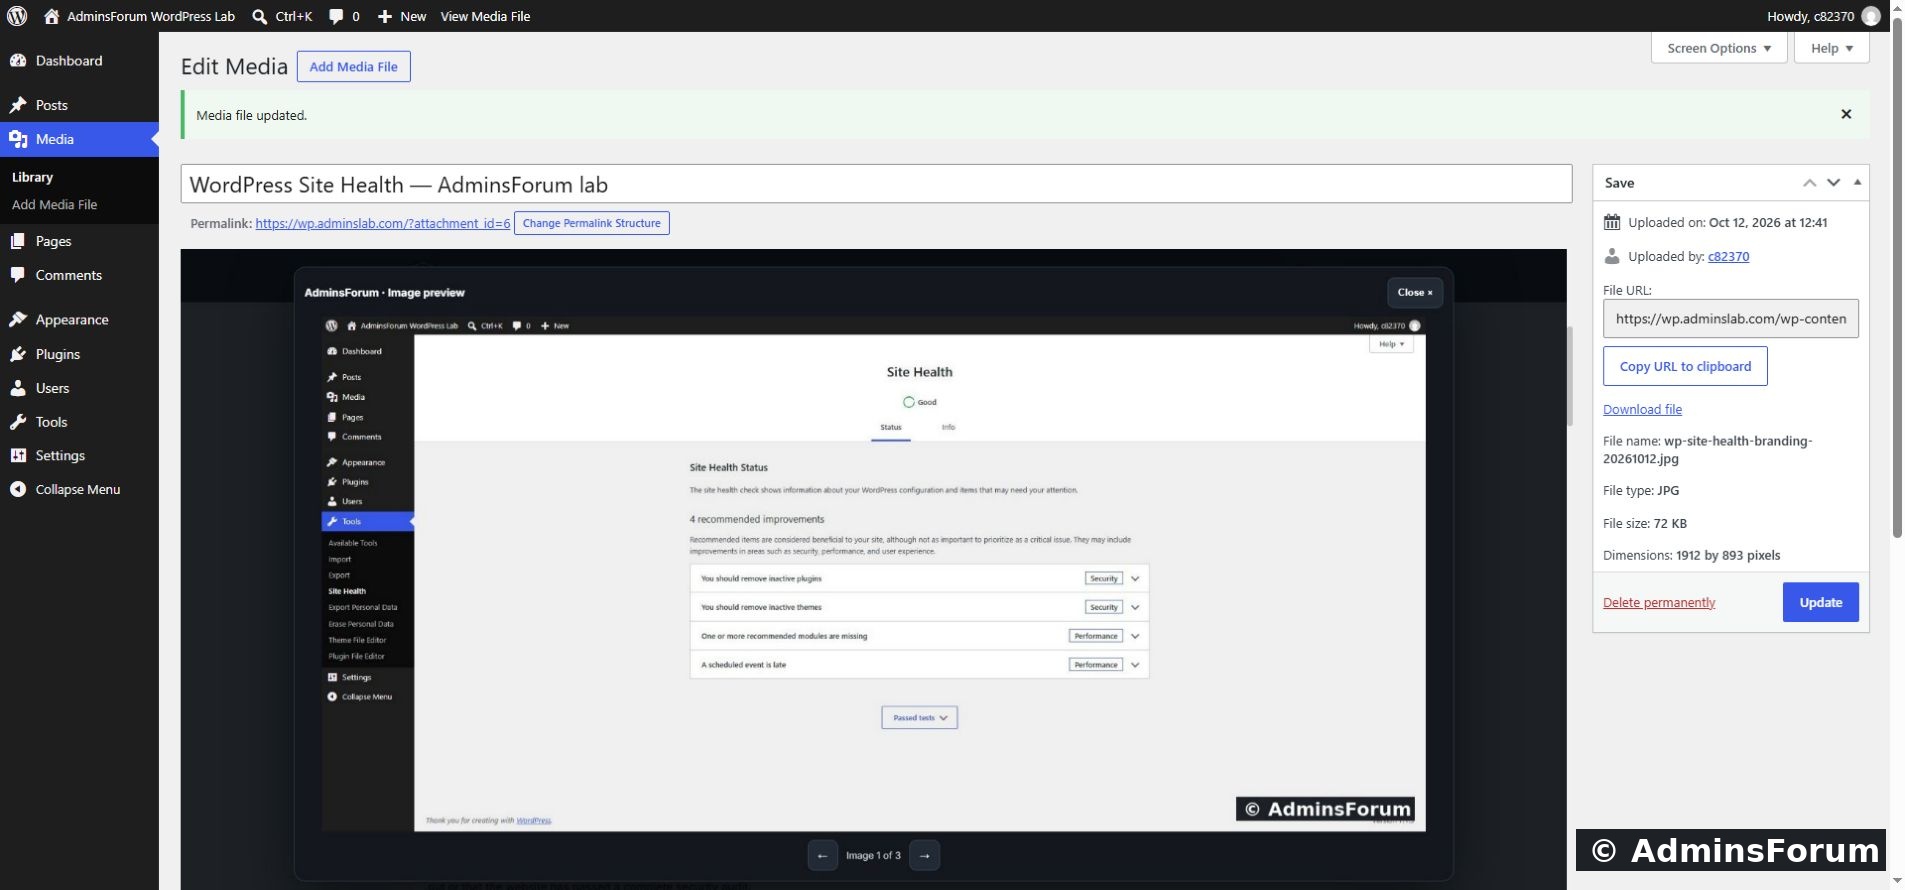
Saved attachment details, file type, size, dimensions and File URL.
Alternative text should match the image’s purpose in its eventual context. The interface notes that purely decorative images can have empty alternative text. A filename alone is often a poor description.
Changing the media title does not automatically rename the uploaded file. Our filename remained unchanged after saving the title and caption.
5. Verify the actual file
Review File URL and open it in a browser tab. Our JPG loaded successfully over HTTPS at its WordPress uploads URL. The attachment reported 1912 × 893 pixels and 72 KB. These are our example’s values, not recommended dimensions for every image.
The file URL is different from an attachment-page permalink. The file URL points to the image itself; the attachment page may be a website page about that media item.
Do not upload confidential files on the assumption that a draft post makes them private. In our test, the direct media URL was accessible. Use a suitable private-storage method for material that should not be public.
6. Use the image in content
Uploading adds the image to Media Library; it does not automatically place it inside every page. In a WordPress page or post, add an Image block and choose the item from Media Library. Check its alternative text, displayed size and caption in that context, then preview the page.
This walkthrough verified the upload and attachment details. Inserting the image into a page and publishing that page are separate content-editing steps.
Troubleshooting
Verified result
Our image uploaded successfully, the title/alternative text/caption saved, and the direct HTTPS image loaded. No upload-limit setting, security restriction or server permission was changed. The demonstration file remains in the lab Media Library.
Screenshots and results are from our own AdminsForum test website.
Use WordPress → Media → Add Media File, select your image and wait for the upload to finish. Open Edit to add a meaningful title, alternative text and caption, then save and verify the file URL. You do not need to open aaPanel’s file manager for an ordinary WordPress media upload.
We tested this on our aaPanel-hosted wp.adminslab.com website running WordPress 7.1.3 and PHP 8.5.11. The JPEG upload, attachment details and direct HTTPS image URL were verified.
1. Prepare the image
Use an image you have permission to publish. Give it a clear filename before uploading and choose dimensions appropriate for its purpose. Avoid uploading camera originals when a smaller image will do. Review screenshots for passwords, tokens, private messages and other information that should not become public.
For this demonstration we used our own AdminsForum-branded Site Health screenshot. A copyright mark identifies the source; it does not prevent someone from copying the file.
2. Open the uploader
Sign in to your WordPress administrator dashboard and select Media → Add Media File. Our screen offered Select Files and displayed a 50 MB maximum upload size.
WordPress’s upload screen on our lab. Your server may have a different limit.
The number is a maximum, not a target image size. Small, appropriately sized images usually transfer more efficiently than large originals. If your file exceeds the limit, optimize it first or review the website’s PHP configuration rather than assuming WordPress is broken.
3. Select and upload the file
Click Select Files and choose your image. Wait for the upload to complete. Do not close the tab while progress is running or retry repeatedly before the original operation finishes.
Our uploaded file appears with Edit and Copy URL to clipboard actions.
If the normal uploader fails, the screen also offers a browser uploader. That is an alternative upload interface, not a way to bypass server limits or file-type restrictions.
4. Add useful attachment details
Click Edit next to the uploaded file. On Edit Media, review:
- Title: a useful name for finding the item in the library.
- Alternative Text: a concise description of what the image communicates. Avoid repeating a list of keywords.
- Image Caption: explanatory text that can be displayed with the image when the content layout uses a caption.
- Description: optional additional attachment information.
We set a readable title, described the visible Site Health result in Alternative Text and added a short lab caption. Then we clicked Update.
Saved attachment details, file type, size, dimensions and File URL.
Alternative text should match the image’s purpose in its eventual context. The interface notes that purely decorative images can have empty alternative text. A filename alone is often a poor description.
Changing the media title does not automatically rename the uploaded file. Our filename remained unchanged after saving the title and caption.
5. Verify the actual file
Review File URL and open it in a browser tab. Our JPG loaded successfully over HTTPS at its WordPress uploads URL. The attachment reported 1912 × 893 pixels and 72 KB. These are our example’s values, not recommended dimensions for every image.
The file URL is different from an attachment-page permalink. The file URL points to the image itself; the attachment page may be a website page about that media item.
Do not upload confidential files on the assumption that a draft post makes them private. In our test, the direct media URL was accessible. Use a suitable private-storage method for material that should not be public.
6. Use the image in content
Uploading adds the image to Media Library; it does not automatically place it inside every page. In a WordPress page or post, add an Image block and choose the item from Media Library. Check its alternative text, displayed size and caption in that context, then preview the page.
This walkthrough verified the upload and attachment details. Inserting the image into a page and publishing that page are separate content-editing steps.
Troubleshooting
- File too large: compare the file with the maximum shown, reduce its size where appropriate and confirm the PHP version/configuration serving the site before changing limits.
- File type rejected: use a supported image format. Do not enable unrestricted uploads as a shortcut.
- Upload succeeds but image does not load: inspect the exact file URL, permissions and server response. Check cache or mixed-content issues without disabling HTTPS protections.
- A thumbnail looks different: WordPress may create smaller image sizes. Review the size selected in the content block and compare it with the original.
Verified result
Our image uploaded successfully, the title/alternative text/caption saved, and the direct HTTPS image loaded. No upload-limit setting, security restriction or server permission was changed. The demonstration file remains in the lab Media Library.
Screenshots and results are from our own AdminsForum test website.