



10-12-2026, 12:50 PM
How do you set a featured image in WordPress?
Open the page or post editor, select the Page or Post settings tab and click Set featured image. Choose an image from Media Library, confirm the selection, then save the content and preview it. Where it appears depends on the theme and template.
We tested this on the draft page created in our page-and-preview walkthrough. The aaPanel-hosted lab runs WordPress 7.1.3 with the Twenty Twenty-Five theme. The image selection persisted after reloading the editor and appeared in the draft preview.
Featured image versus an Image block
A featured image is associated with the page or post as a whole. Themes may display it in a header, article card or another template location. An Image block places a picture at a specific position inside the content.
Selecting a featured image does not automatically insert an Image block into your paragraph. It also does not guarantee that your SEO plugin will use it as the social-sharing image. Review the theme and any SEO/sharing settings separately.
1. Open the content editor
In WordPress choose Pages → All Pages or Posts → All Posts, then Edit the correct item. We used our saved About-this-website draft rather than changing a published page.
If the settings sidebar is closed, use Settings in the editor’s top bar. Select the Page or Post tab instead of Block. In our page editor the sidebar offered Set featured image.
2. Choose an existing image
Click Set featured image. The Featured image dialog offers Upload files and Media Library. We chose Media Library because the demonstration image was already uploaded.
Select the exact image. Check its title, thumbnail and attachment information before confirming. If your library is large, use Search media and the date/type filters to locate the intended item.
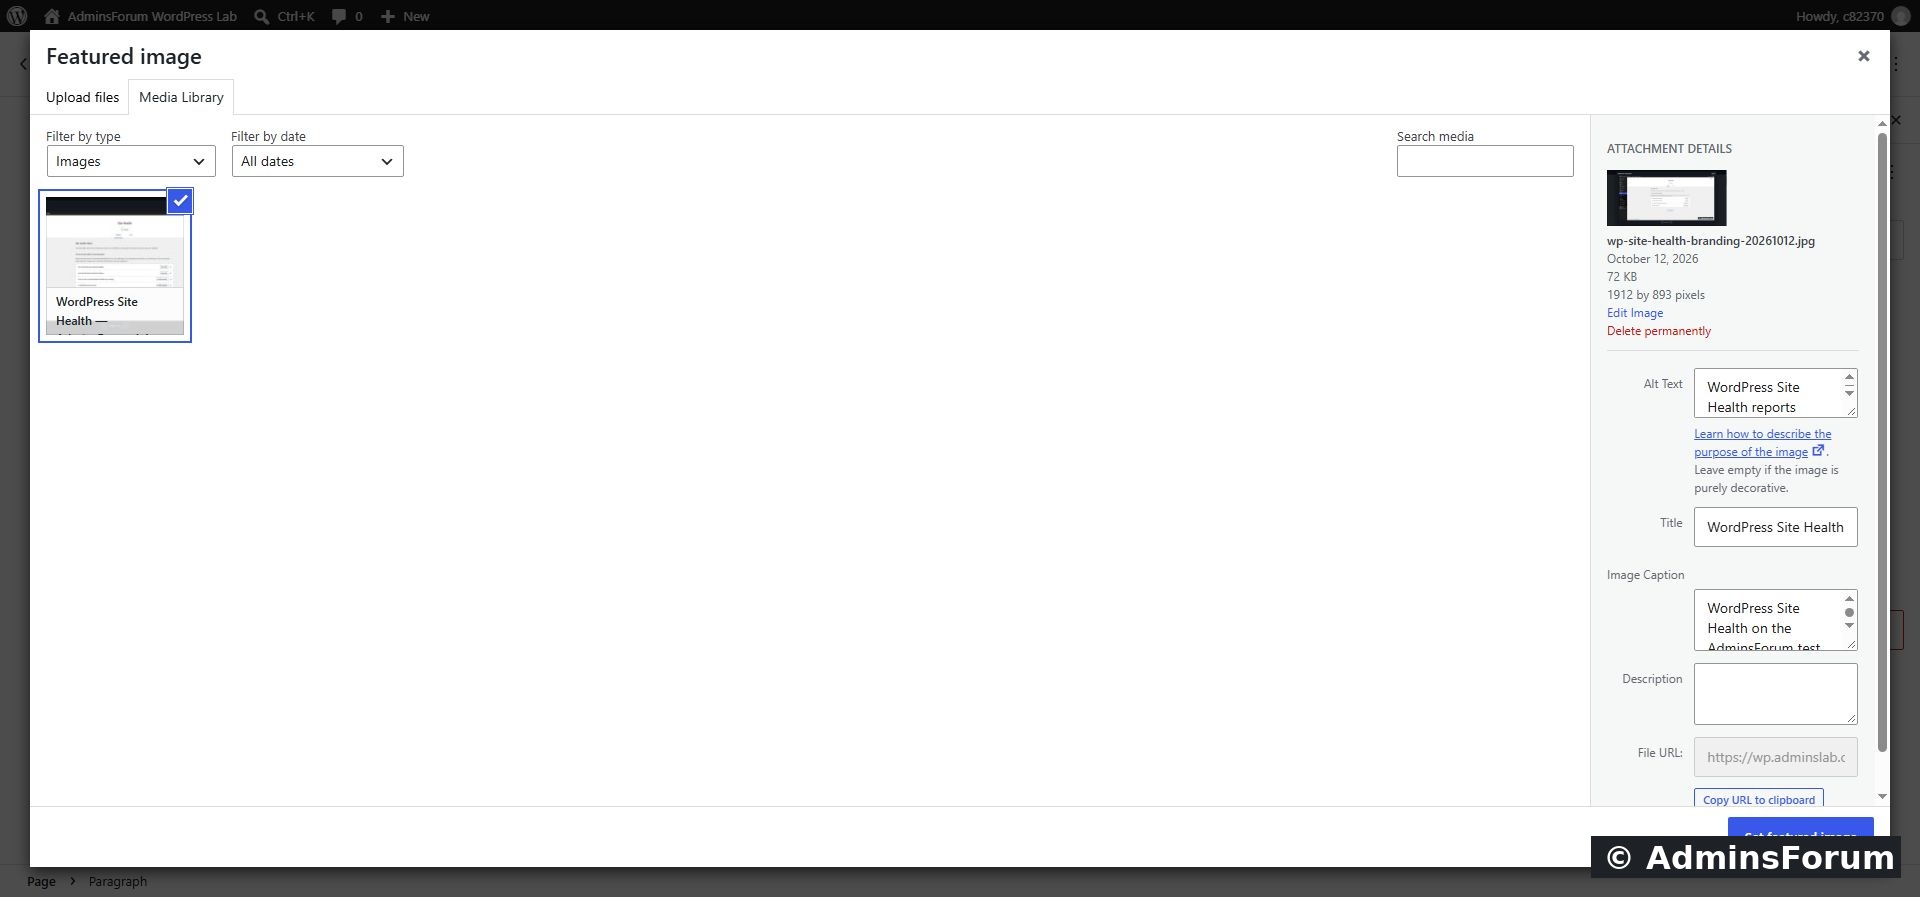
Our selected AdminsForum image in the Featured image dialog.
For uploading a new item, follow our WordPress media-upload guide. Review screenshots for private information before uploading, and only publish images you are allowed to use.
3. Set the featured image
Click Set featured image in the dialog. The dialog closes and the editor sidebar should show a thumbnail plus Replace and Remove controls.
Our image already had useful alternative text saved in Media Library. Review image descriptions for the context in which the picture is used. Avoid using a keyword list as alternative text.
4. Save and verify persistence
Click Save draft when editing a draft. Wait for the save to finish. For existing public content the save control may differ; review what action it will perform before submitting.
Reload or reopen the editor after saving. We verified that the selected image remained associated with the draft after the editor reloaded.
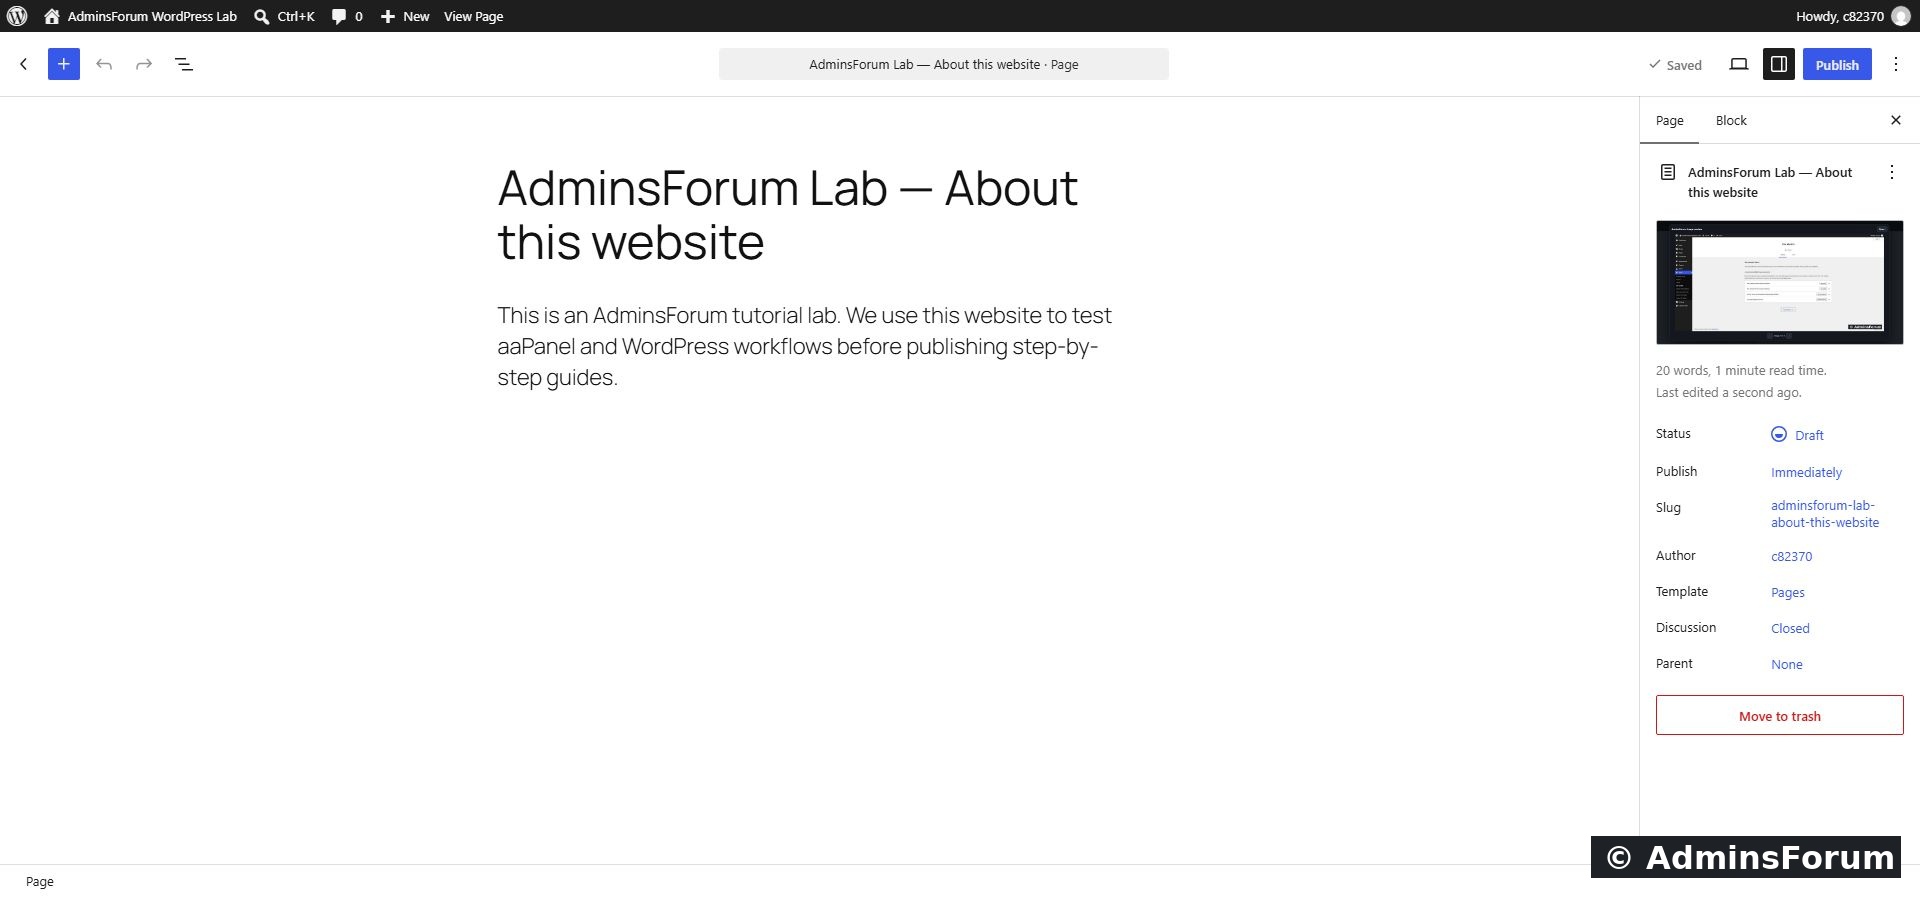
The saved editor shows the featured image and keeps the page status as Draft.
An image visible immediately after selection is not proof that it was saved. Confirm the saved state and reopen the editor when you need to be certain.
5. Preview the page in its theme
Use View → Preview in new tab. Inspect where the theme places the image, how it scales and whether the crop is suitable for the page. Check the layout on relevant screen sizes before publishing.
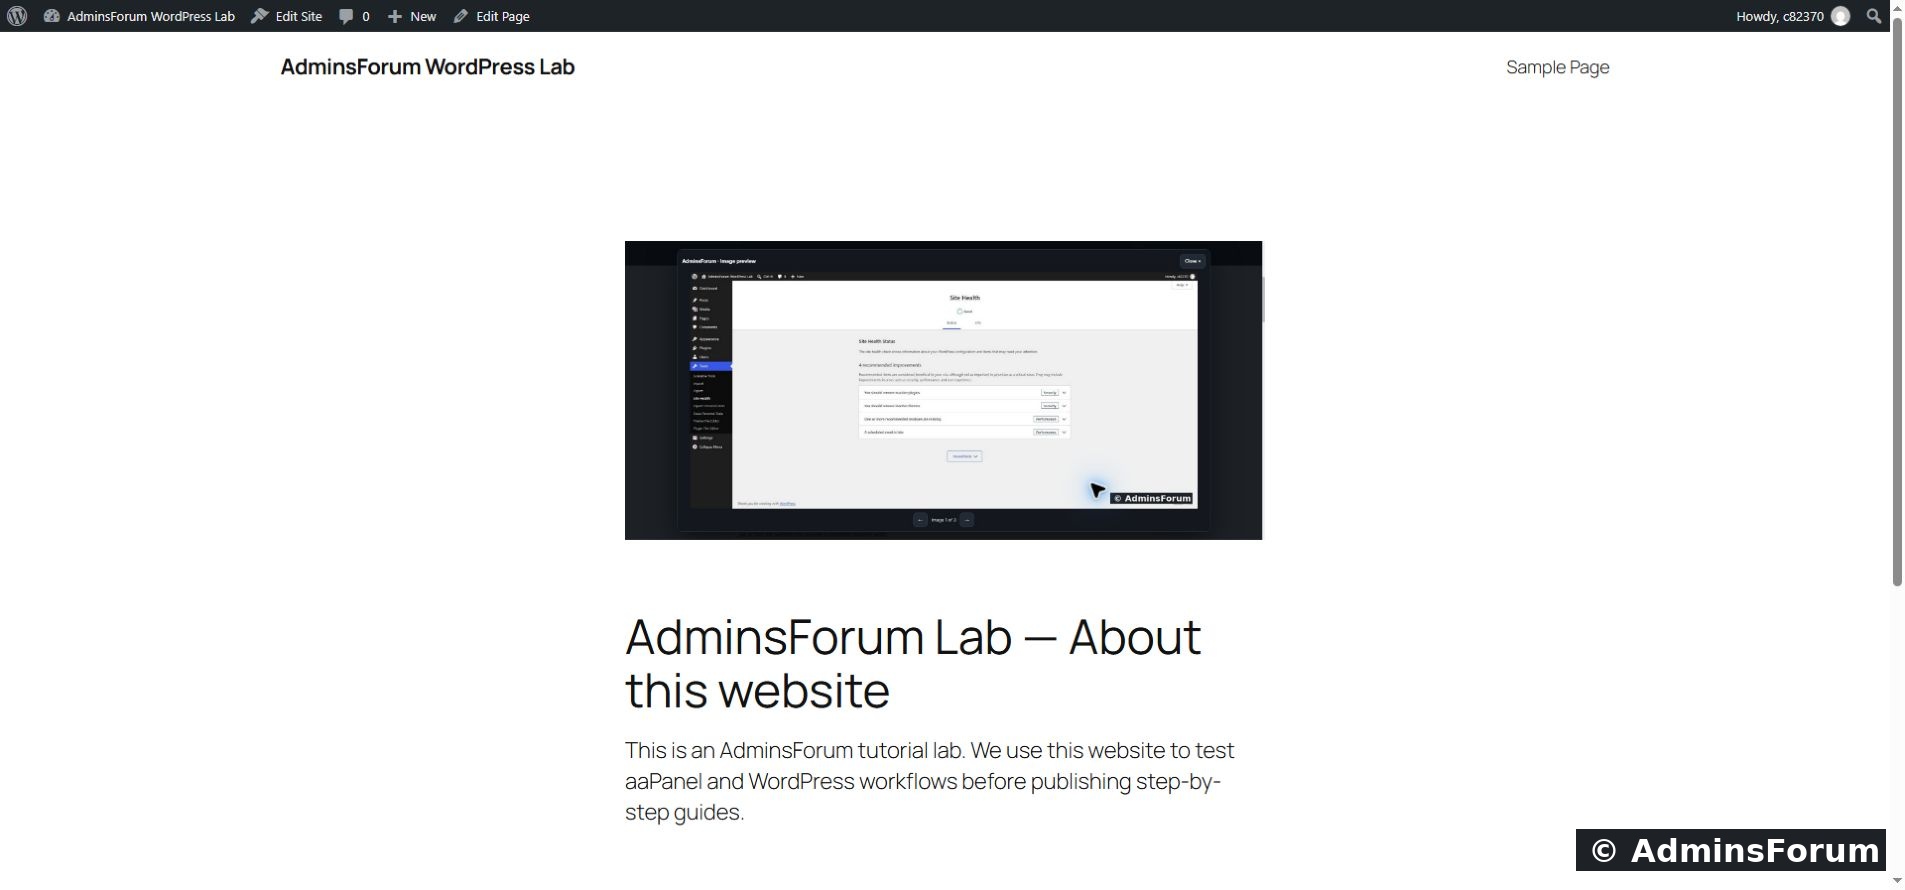
Our Twenty Twenty-Five draft preview displayed the selected featured image.
Other themes or templates may not display a featured image in the same location—or may not display it at all. If it is saved but absent from the page, inspect the template before assuming the upload failed.
The preview is not the same as publishing. Our demonstration page stayed a draft. The uploaded image itself already had a direct file URL; draft content should not be treated as private file storage.
6. Replace or remove the association
The sidebar exposes Replace and Remove controls. Replace lets you choose another featured image. Remove clears its association with this item; it is different from deleting the file from Media Library.
We did not test those removal actions in this walkthrough. Before deleting a media file, check whether other pages use it. Deleting the shared file can affect more than one content item.
Troubleshooting
Verified result
We selected an existing media item, assigned it as the featured image, saved the draft, verified the selection after reloading and confirmed the image in the theme preview. We did not publish the lab page, replace/delete the attachment or verify social-sharing metadata for that WordPress page.
Screenshots and results are from our own AdminsForum lab.
Open the page or post editor, select the Page or Post settings tab and click Set featured image. Choose an image from Media Library, confirm the selection, then save the content and preview it. Where it appears depends on the theme and template.
We tested this on the draft page created in our page-and-preview walkthrough. The aaPanel-hosted lab runs WordPress 7.1.3 with the Twenty Twenty-Five theme. The image selection persisted after reloading the editor and appeared in the draft preview.
Featured image versus an Image block
A featured image is associated with the page or post as a whole. Themes may display it in a header, article card or another template location. An Image block places a picture at a specific position inside the content.
Selecting a featured image does not automatically insert an Image block into your paragraph. It also does not guarantee that your SEO plugin will use it as the social-sharing image. Review the theme and any SEO/sharing settings separately.
1. Open the content editor
In WordPress choose Pages → All Pages or Posts → All Posts, then Edit the correct item. We used our saved About-this-website draft rather than changing a published page.
If the settings sidebar is closed, use Settings in the editor’s top bar. Select the Page or Post tab instead of Block. In our page editor the sidebar offered Set featured image.
2. Choose an existing image
Click Set featured image. The Featured image dialog offers Upload files and Media Library. We chose Media Library because the demonstration image was already uploaded.
Select the exact image. Check its title, thumbnail and attachment information before confirming. If your library is large, use Search media and the date/type filters to locate the intended item.
Our selected AdminsForum image in the Featured image dialog.
For uploading a new item, follow our WordPress media-upload guide. Review screenshots for private information before uploading, and only publish images you are allowed to use.
3. Set the featured image
Click Set featured image in the dialog. The dialog closes and the editor sidebar should show a thumbnail plus Replace and Remove controls.
Our image already had useful alternative text saved in Media Library. Review image descriptions for the context in which the picture is used. Avoid using a keyword list as alternative text.
4. Save and verify persistence
Click Save draft when editing a draft. Wait for the save to finish. For existing public content the save control may differ; review what action it will perform before submitting.
Reload or reopen the editor after saving. We verified that the selected image remained associated with the draft after the editor reloaded.
The saved editor shows the featured image and keeps the page status as Draft.
An image visible immediately after selection is not proof that it was saved. Confirm the saved state and reopen the editor when you need to be certain.
5. Preview the page in its theme
Use View → Preview in new tab. Inspect where the theme places the image, how it scales and whether the crop is suitable for the page. Check the layout on relevant screen sizes before publishing.
Our Twenty Twenty-Five draft preview displayed the selected featured image.
Other themes or templates may not display a featured image in the same location—or may not display it at all. If it is saved but absent from the page, inspect the template before assuming the upload failed.
The preview is not the same as publishing. Our demonstration page stayed a draft. The uploaded image itself already had a direct file URL; draft content should not be treated as private file storage.
6. Replace or remove the association
The sidebar exposes Replace and Remove controls. Replace lets you choose another featured image. Remove clears its association with this item; it is different from deleting the file from Media Library.
We did not test those removal actions in this walkthrough. Before deleting a media file, check whether other pages use it. Deleting the shared file can affect more than one content item.
Troubleshooting
- No Set featured image control: confirm that the document settings tab is selected, and check whether your theme/content type supports featured images.
- Selection disappears after reload: inspect whether the save completed, whether the session expired and whether the editor reported an error.
- Image saved but not shown in preview: review the theme’s page/post template and cache behavior.
- Image crop is unsuitable: choose artwork that fits the template’s display area and inspect the actual preview before publication.
- Social preview still uses another image: check your SEO/sharing configuration separately; featured-image selection alone does not verify Open Graph output.
Verified result
We selected an existing media item, assigned it as the featured image, saved the draft, verified the selection after reloading and confirmed the image in the theme preview. We did not publish the lab page, replace/delete the attachment or verify social-sharing metadata for that WordPress page.
Screenshots and results are from our own AdminsForum lab.