



10-19-2026, 02:32 PM
CloudPanel site security: block IPs and bots, password-protect a site and allow Cloudflare only
Every site in CloudPanel has its own Security tab. From there you can block abusive IP addresses and bad bots, put a password in front of a staging or development site, and make sure visitors can only reach the site through Cloudflare. All four settings work at the Nginx level, so blocked traffic never reaches PHP or your app.
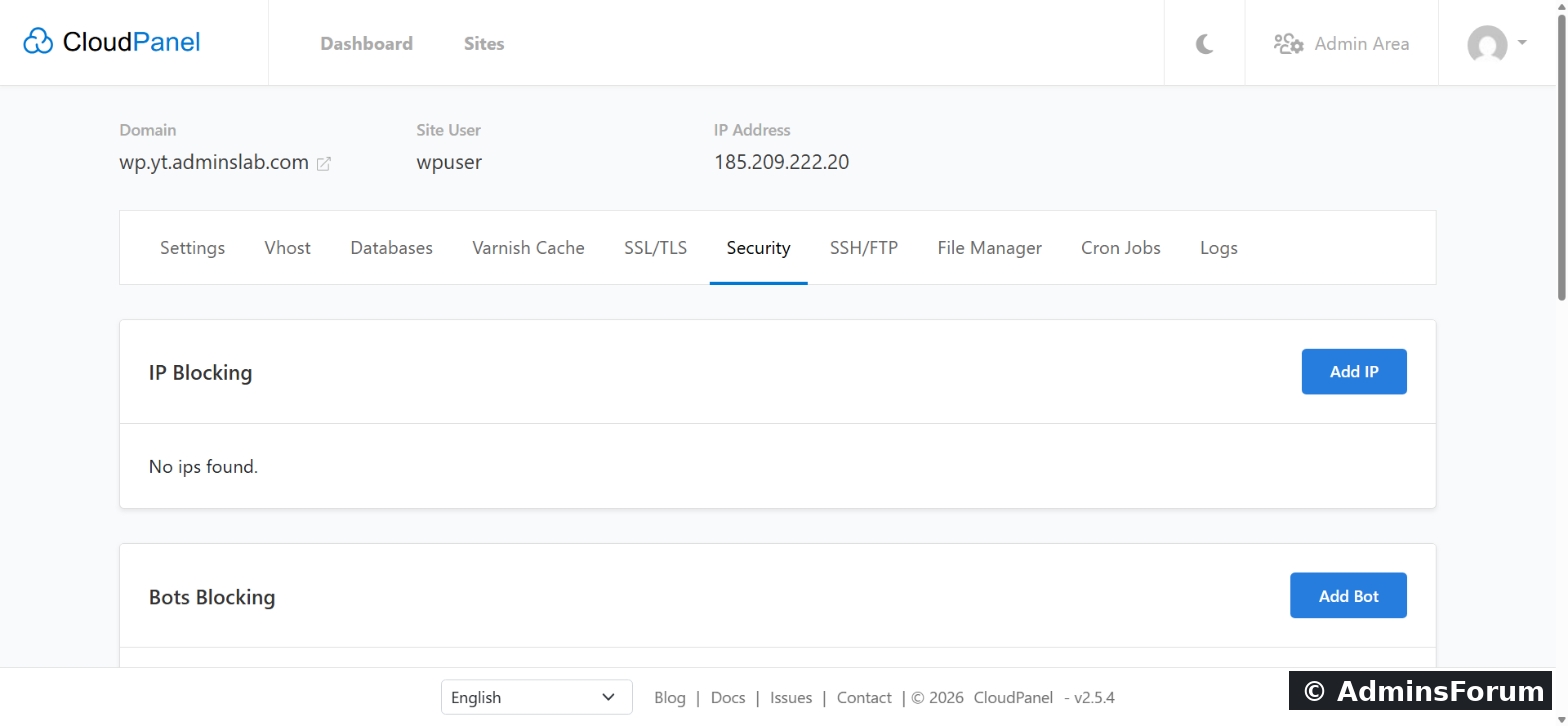
To open it: Sites > Manage (next to your site) > Security.
1. Block an IP address
Use this for a single abusive address, for example one that keeps hammering wp-login.php or your contact form.
Blocking single IPs doesn't help much against attacks from many addresses. For those, use Cloudflare (section 4) or the CloudPanel firewall in the Admin Area.
2. Block bad bots
Some crawlers ignore robots.txt and waste CPU. You can block them by the name in their User-Agent.
3. Password-protect the site (Basic Authentication)
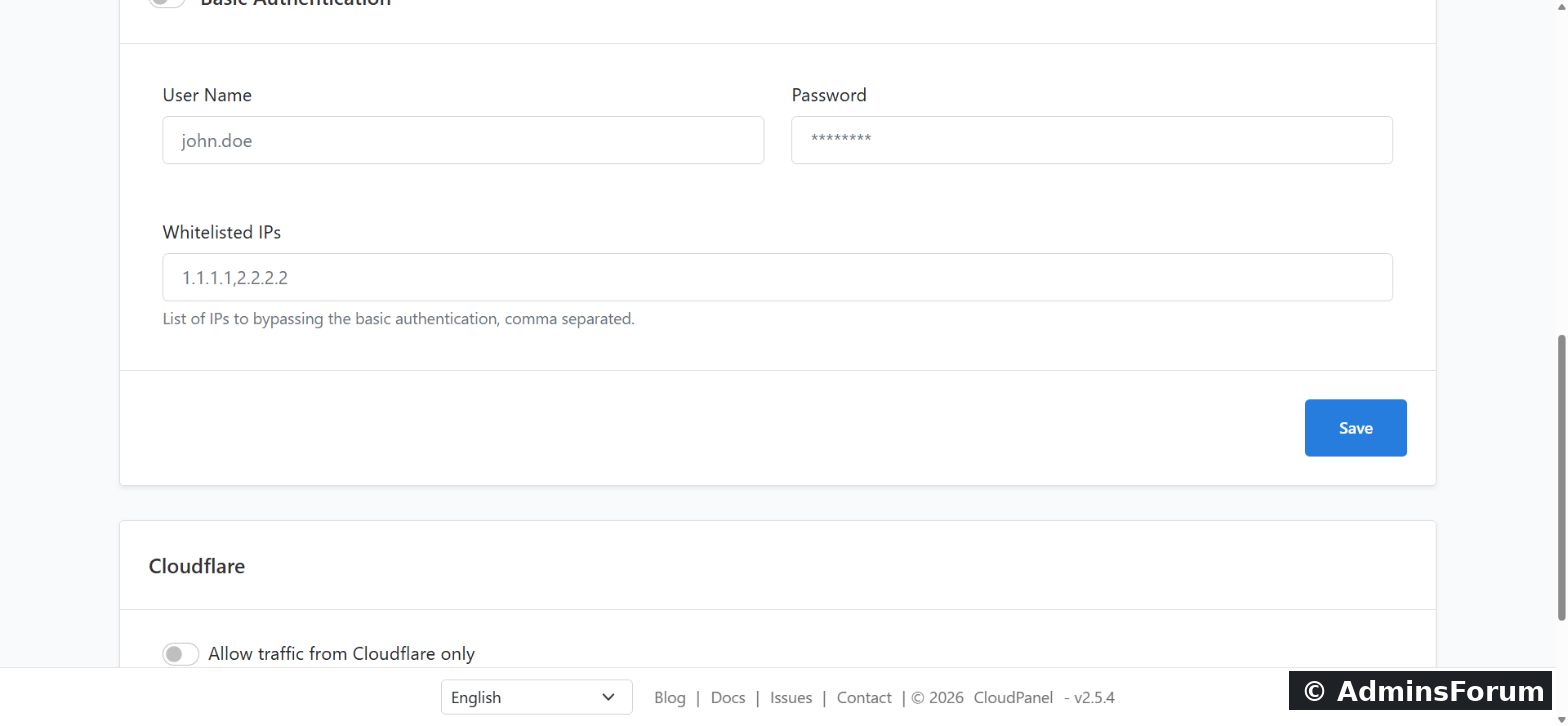
Basic Auth shows a browser login box before anyone can see the site. It's ideal for staging copies, development sites and sites that aren't ready to launch, and it keeps search engines from indexing them.
Things to know:
4. Allow traffic from Cloudflare only
If your site runs behind Cloudflare, attackers can still bypass it by sending requests straight to your server's IP. This switch makes the site answer only requests that come through Cloudflare's network.
Cloudflare publishes its IP ranges and changes them from time to time. As root you can refresh the list CloudPanel uses with:
Which option should I use?
Tested on CloudPanel v2.5.4. Sources (checked October 2026): CloudPanel: Site security
Related: CloudPanel backups and security: firewall and Basic Auth for the panel
Every site in CloudPanel has its own Security tab. From there you can block abusive IP addresses and bad bots, put a password in front of a staging or development site, and make sure visitors can only reach the site through Cloudflare. All four settings work at the Nginx level, so blocked traffic never reaches PHP or your app.
To open it: Sites > Manage (next to your site) > Security.
1. Block an IP address
Use this for a single abusive address, for example one that keeps hammering wp-login.php or your contact form.
- On the Security tab, under IP Blocking, click Add IP.
- Enter an IPv4 address (like ) or an IPv6 address and click Add IP.Code:
203.0.113.25
Blocking single IPs doesn't help much against attacks from many addresses. For those, use Cloudflare (section 4) or the CloudPanel firewall in the Admin Area.
2. Block bad bots
Some crawlers ignore robots.txt and waste CPU. You can block them by the name in their User-Agent.
- Under Bots Blocking, click Add Bot.
- Enter the bot name, for example orCode:
MJ12bot, and click Add Bot.Code:PetalBot
3. Password-protect the site (Basic Authentication)
Basic Auth shows a browser login box before anyone can see the site. It's ideal for staging copies, development sites and sites that aren't ready to launch, and it keeps search engines from indexing them.
- Turn on the Basic Authentication switch.
- Enter a User Name and a strong Password.
- Optional: under Whitelisted IPs, add your own IP addresses, comma-separated, so you can skip the login box.
- Click Save.
Things to know:
- Basic Auth also blocks uptime monitors, webhooks and payment callbacks. Whitelist their IPs if a staging site needs them.
- Always use it together with HTTPS, so the password isn't sent in plain text.
- To protect the CloudPanel login itself, use Admin Area > Security > Basic Auth instead.
4. Allow traffic from Cloudflare only
If your site runs behind Cloudflare, attackers can still bypass it by sending requests straight to your server's IP. This switch makes the site answer only requests that come through Cloudflare's network.
- In Cloudflare, make sure the site's DNS records are Proxied (orange cloud).
- In CloudPanel, turn on Allow traffic from Cloudflare only in the Cloudflare section.
- Open the site in a browser to confirm it still loads.
Cloudflare publishes its IP ranges and changes them from time to time. As root you can refresh the list CloudPanel uses with:
Code:
clpctl cloudflare:update:ipsWhich option should I use?
- One noisy IP: IP Blocking.
- A crawler wasting resources: Bots Blocking.
- A site that shouldn't be public yet: Basic Authentication.
- Bigger attacks, or you already use Cloudflare: Cloudflare proxy plus "Allow traffic from Cloudflare only".
Tested on CloudPanel v2.5.4. Sources (checked October 2026): CloudPanel: Site security
Related: CloudPanel backups and security: firewall and Basic Auth for the panel