



10-16-2026, 08:13 AM
CloudPanel does not include a built-in mailbox service. You can host a website on CloudPanel, keep business mailboxes with an email provider, and configure the website to send messages through authenticated SMTP or a supported email API.
This guide explains the choices and a provider-neutral setup sequence, checked against the references below. It does not claim a new provider integration was tested on our lab. The branded diagram illustrates the architecture; it is not a panel screenshot.
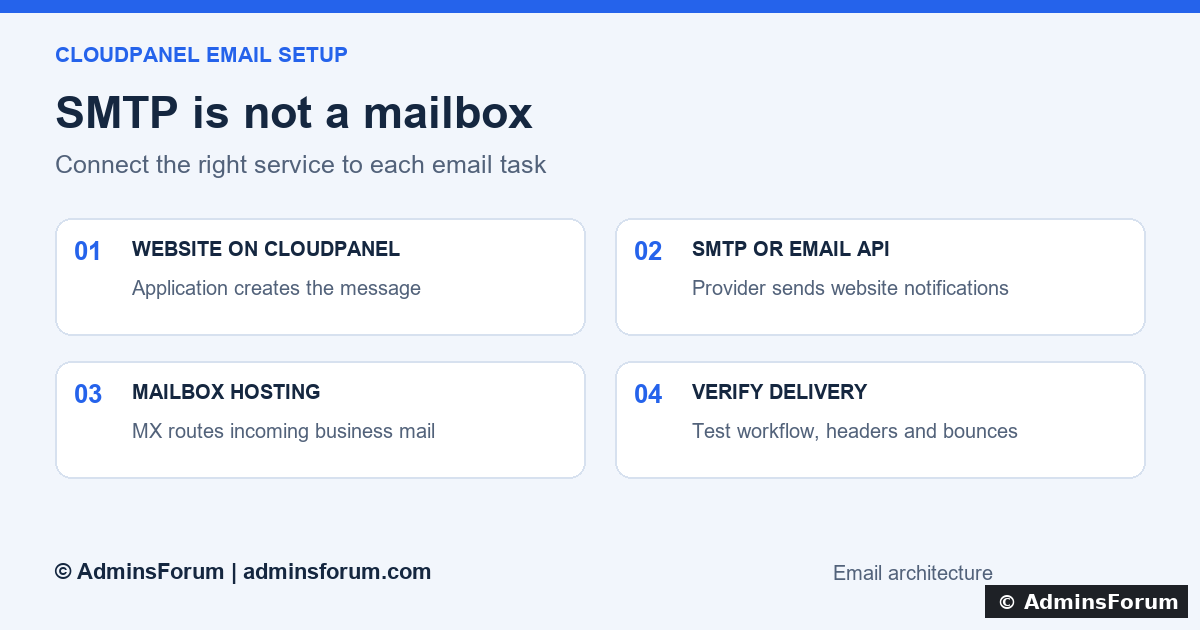
AdminsForum email architecture: website hosting, outbound message delivery and incoming mailboxes have separate responsibilities.
1. Decide what you need email to do
CloudPanel's official email page directs users toward external email services and also documents a separate self-hosted option. A separate mail-server installation has its own updates, backups, ports, security and deliverability requirements. This guide does not install a mail server on the website VPS.
2. Gather the provider's exact sending settings
Before changing the website, obtain the SMTP hostname, port, encryption method, authentication method and permitted sender address from the selected provider. For an API mailer, obtain the supported integration settings instead of inventing an SMTP configuration.
Ports 587 with STARTTLS and 465 with implicit TLS are common submission choices, but use the combination your provider specifies. A mailbox password, provider app password, SMTP credential and API key are not automatically interchangeable. Some providers require OAuth or another supported authentication flow.
Use credentials scoped to the website's needs. Keep them out of screenshots, public logs, source repositories and support posts. Check provider sending limits, allowed message types and whether the account can send to real recipients or remains in a test/sandbox mode.
3. Set up incoming mail separately
If you need an inbox, create it at the mailbox provider and use that provider's MX records for the domain. Preserve existing working mail routing while adding website sending. Do not point the MX record at the CloudPanel website VPS simply because the website runs there.
An MX record identifies incoming mail routing. It does not tell WordPress which SMTP server to use and does not authorize every outbound sender. Check the provider's webmail or mail client separately: an inbox that receives mail does not prove the website can send it.
4. Configure the application sender
For WordPress, configure one maintained SMTP/API mail plugin that supports your provider. WP Mail SMTP is one example listed in the official WordPress directory; other maintained integrations can work too. Check which features are available in your installed edition. Avoid activating multiple plugins that compete to replace the outgoing mail transport.
The general sequence is:
CloudPanel also documents a WordPress CLP E-Mail Sender From plugin. Its purpose is changing the sender name and address. Changing the From header alone does not establish an SMTP transport, create a mailbox or guarantee delivery.
For a contact form, use your verified domain address as From and the visitor's address as Reply-To where supported. Using arbitrary visitor addresses as your sender can break authentication alignment and impersonate another domain.
5. Add the DNS records the sending service provides
Publish the exact verification and authentication records issued by your provider in the authoritative DNS service. Check whether it expects TXT or CNAME records and how that DNS interface handles the domain suffix.
6. Test the real website workflow
Send a plugin test message to an inbox you control and inspect the provider's delivery event. Then test the actual function you need: for example, a contact form or registration notification using a designated test account.
Inspect the received message's authentication results and sender identity. Check the inbox and spam folder. A “sent” result may mean the application handed the message to the provider; it is not proof the recipient received it in the inbox. Look for bounces, rejection events and suppressed recipients.
For password-reset testing, use only your designated account and keep the reset link private. Do not repeatedly trigger messages for real members as a diagnostic test.
7. Troubleshoot at the failing layer
8. Keep a safe rollback and monitoring plan
If a change fails, restore the previous application settings. Reverting SMTP settings does not automatically revert DNS, so record both. Keep inbound MX records untouched unless you are intentionally migrating mailboxes.
Track delivery failures and sending quotas without retaining unnecessary message content. Send a controlled check after deployments or provider changes, and use a tested backup/restore process for the website configuration. See our CloudPanel backup verification guide.
Need help with CloudPanel email?
Post the application and plugin versions, provider name, redacted error, relevant timestamp and which test failed in CloudPanel Support & Troubleshooting. Do not include passwords, API keys, message bodies or reset links. For application failures, our CloudPanel logs guide explains how to collect useful evidence.
References
CloudPanel email options
CloudPanel WordPress sender-address tool
WP Mail SMTP official WordPress listing
Google email sender guidelines
This guide explains the choices and a provider-neutral setup sequence, checked against the references below. It does not claim a new provider integration was tested on our lab. The branded diagram illustrates the architecture; it is not a panel screenshot.
AdminsForum email architecture: website hosting, outbound message delivery and incoming mailboxes have separate responsibilities.
1. Decide what you need email to do
- Business inbox: an address such as [email protected] where a person reads and replies to mail. This needs mailbox hosting, not just an SMTP setting.
- Website notifications: password resets, registration messages and contact-form notifications. These need an outbound sending route from the application.
- Marketing mail: campaigns and newsletters need an appropriate sending service and consent/unsubscribe handling; do not assume a mailbox plan permits bulk sending.
CloudPanel's official email page directs users toward external email services and also documents a separate self-hosted option. A separate mail-server installation has its own updates, backups, ports, security and deliverability requirements. This guide does not install a mail server on the website VPS.
2. Gather the provider's exact sending settings
Before changing the website, obtain the SMTP hostname, port, encryption method, authentication method and permitted sender address from the selected provider. For an API mailer, obtain the supported integration settings instead of inventing an SMTP configuration.
Ports 587 with STARTTLS and 465 with implicit TLS are common submission choices, but use the combination your provider specifies. A mailbox password, provider app password, SMTP credential and API key are not automatically interchangeable. Some providers require OAuth or another supported authentication flow.
Use credentials scoped to the website's needs. Keep them out of screenshots, public logs, source repositories and support posts. Check provider sending limits, allowed message types and whether the account can send to real recipients or remains in a test/sandbox mode.
3. Set up incoming mail separately
If you need an inbox, create it at the mailbox provider and use that provider's MX records for the domain. Preserve existing working mail routing while adding website sending. Do not point the MX record at the CloudPanel website VPS simply because the website runs there.
An MX record identifies incoming mail routing. It does not tell WordPress which SMTP server to use and does not authorize every outbound sender. Check the provider's webmail or mail client separately: an inbox that receives mail does not prove the website can send it.
4. Configure the application sender
For WordPress, configure one maintained SMTP/API mail plugin that supports your provider. WP Mail SMTP is one example listed in the official WordPress directory; other maintained integrations can work too. Check which features are available in your installed edition. Avoid activating multiple plugins that compete to replace the outgoing mail transport.
The general sequence is:
- Back up the website configuration and record the existing mail settings.
- Install the chosen integration from its official source and open its settings.
- Select your provider's mailer, or its supported SMTP option.
- Enter the exact host, port, encryption and authentication values supplied by the provider.
- Set a From address that the provider authorizes for your domain.
- Save settings and use the integration's test function to send to an inbox you control.
CloudPanel also documents a WordPress CLP E-Mail Sender From plugin. Its purpose is changing the sender name and address. Changing the From header alone does not establish an SMTP transport, create a mailbox or guarantee delivery.
For a contact form, use your verified domain address as From and the visitor's address as Reply-To where supported. Using arbitrary visitor addresses as your sender can break authentication alignment and impersonate another domain.
5. Add the DNS records the sending service provides
Publish the exact verification and authentication records issued by your provider in the authoritative DNS service. Check whether it expects TXT or CNAME records and how that DNS interface handles the domain suffix.
- SPF: authorize the sending service through the domain's existing SPF policy. Do not add a second competing SPF record for the same name.
- DKIM: publish the provider's signing selector records, then confirm signing is enabled at the provider.
- DMARC: check alignment with the visible From domain and plan policy changes using real authentication results. A strict policy introduced before legitimate senders align can reject valid mail.
6. Test the real website workflow
Send a plugin test message to an inbox you control and inspect the provider's delivery event. Then test the actual function you need: for example, a contact form or registration notification using a designated test account.
Inspect the received message's authentication results and sender identity. Check the inbox and spam folder. A “sent” result may mean the application handed the message to the provider; it is not proof the recipient received it in the inbox. Look for bounces, rejection events and suppressed recipients.
For password-reset testing, use only your designated account and keep the reset link private. Do not repeatedly trigger messages for real members as a diagnostic test.
7. Troubleshoot at the failing layer
- Connection timeout: verify hostname, port, outbound network rules and provider reachability from the VPS. Website HTTPS working does not prove SMTP connectivity.
- Authentication failed: confirm the exact credential type and provider account requirements. Do not disable encryption to work around login failure.
- Sender rejected: confirm sender verification and allowed From addresses.
- Provider accepted but recipient rejected: inspect the bounce and recipient response before retrying.
- Delivered to spam: inspect authentication, reputation and message content. Passing authentication helps, but does not guarantee inbox placement.
- Test email works but application mail fails: check the form's recipient, From/Reply-To settings, application queue, scheduled jobs and relevant logs.
8. Keep a safe rollback and monitoring plan
If a change fails, restore the previous application settings. Reverting SMTP settings does not automatically revert DNS, so record both. Keep inbound MX records untouched unless you are intentionally migrating mailboxes.
Track delivery failures and sending quotas without retaining unnecessary message content. Send a controlled check after deployments or provider changes, and use a tested backup/restore process for the website configuration. See our CloudPanel backup verification guide.
Need help with CloudPanel email?
Post the application and plugin versions, provider name, redacted error, relevant timestamp and which test failed in CloudPanel Support & Troubleshooting. Do not include passwords, API keys, message bodies or reset links. For application failures, our CloudPanel logs guide explains how to collect useful evidence.
References
CloudPanel email options
CloudPanel WordPress sender-address tool
WP Mail SMTP official WordPress listing
Google email sender guidelines
